It’s that time again: deer season has come to an end, and aside from shed hunting, there’s very little to keep the whitetail-driven mind busy. While this “lull” period can be a great time to reset and begin preparing for turkey season, it’s also the perfect time to begin sorting through and logging the overwhelming amount of data our trail cameras accumulated during the fall. After all, next season really does begin now.
I used to believe that organizing and filing trail camera data was something reserved for those hunting hundreds of acres of prime whitetail ground. But once I began this practice a few years ago, I realized its importance and have since reaped the benefits many times over.
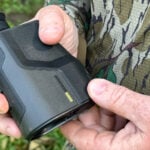
Even if you keep your cameras deployed all year long, it’s still good practice to bring them in after season for a check-up, battery refresh, and to empty those SD cards that are fat with intel.
But far too often, we save the few photos we have of shooter bucks to pass around to our buddies, then toss the rest in the digital garbage can. But the truth is, if organized and filed correctly, the bulk of these photos could help you succeed for many years to come.

Why Archive?
Technology gets a lot of flak in the hunting world today. We’re told that it softens us as hunters, gives us an unfair advantage, and takes away our woodsmanship, and unfortunately, that can be the truth. But it doesn’t have to be.
Trail cameras provide us with a private eye – a fly on the wall, if you will – into the lives of whitetail. We’re not only able to view mature bucks in their natural habitat, but we can store that data and learn from it year after year. If you’re using trail cameras in this application, it’s impossible not to become a better hunter.
These days, the affordability of even the most high-tech cellular trail cameras enables hunters to obtain a strong database that, a handful of years ago, would’ve only been available to those with the deepest of pockets. However, when it comes to organizing and archiving all that data to get the most out of it, it becomes an afterthought. I was in this camp for many years, until one season, I learned firsthand just how deadly past trail camera data can be.
I was hunting a mature nine-pointer that, during the first year I hunted him, only daylighted once on the evening of November 22, 2021. And after ending the season eating tag soup and remembering that one daylight photo, I vowed that next November, come hell or high water, I would be in that exact same spot waiting on him.
Fast forward exactly a year to November 22, 2022, and as I watched my arrow disappear behind the Big Nine’s shoulder, I became a forever believer in reviewing past trail camera data to achieve future success.
If it weren’t for having that one daylight photo, I would likely have never harvested this buck. This made me a believer that trail camera photos aren’t just for finding out where a buck is currently, but are more useful at determining where a buck is going to be.
Identifying and Keeping Tabs on Specific Bucks
It’s evident that the more data you have on a buck, the better. However, too often we only start keeping tabs on a particular buck when it reaches “shooter” status, which means we miss valuable intel.
For this reason, I keep almost every buck photo I receive. The reason I say “almost” is that I don’t keep track of most bucks 2-½ years old or younger because, in my opinion, it isn’t until a buck reaches 3-½ that their personality and physical characteristics begin to develop. However, as with most rules, there’s always an exception.
In the fall of 2022, I picked up a young buck on my trail camera that showed definite promise. He was approximately 2-½ years old at the time, and one of the few bucks that young that I’ve archived photos of.
Fast forward to October 2023, and I received photos of a buck I thought to be a potential shooter. But after looking at the pictures and comparing them with other bucks on the property, I realized this was the same young buck I had countless photos of the year prior. Only now, he added a considerable amount of inches and looked like a completely different animal.
It took me diving back into my archived trail camera photos, looking closely at the configuration of his antlers and the areas of the farm he frequented, for me to realize it was the same buck.
Having this intel not only helped me learn more about this buck but also kept me from possibly harvesting one that was far from prime.
This leads me to another reason why keeping past trail camera data is essential: it can be instrumental in determining a buck’s age. While there are many ways to estimate a buck’s age, the most reliable and foolproof is using past trail camera data.
Because a buck’s body and antlers can change a lot with maturity, it can be difficult to identify the same buck year after year, especially when they go away for a year or two, then come back looking like a completely different animal.
Sometimes, it comes down to a simple physical characteristic, such as a torn ear or a familiar antler configuration. And if you don’t have past trail camera intel to help you piece the puzzle together, you can be out of luck.
Knowing When to Hunt Where
I’ll be the first to say that planning your hunting strategy based on what your trail cameras are telling you can be a recipe for disaster. It can lead you to waste valuable time and ignore hot sign just because you didn’t have enough photo support to make you want to hunt a certain area.
However, because your trail cameras have been out all season, you’re likely to notice a continual ebb and flow of deer activity in an area. Some areas can be completely void of deer activity until a specific oak tree begins dropping acorns or the rut starts heating up. Past trail camera data can take the guesswork out of when to hunt these places.
Now, I’m not saying you should have countless cell cameras and stick them everywhere possible just to know how to hunt a property. There’s an art to running trail cameras and gathering data effectively, and oftentimes it has very little to do with numbers.
Each year, I run only a handful of trail cameras (none cellular) across a few properties, and by the end of the season, I have more than enough data to learn from.
The reason is that I’ve learned to listen to my trail cameras over the years, and I know when to move a trail camera off a woodline and back into the timber to continue monitoring the deer. Or when a food source is about to dry up, and I need to move my camera to another food source.
I experienced this last year when hunting a new 40-acre permission farm. Given that I was starting from scratch, I placed a couple of trail cameras in areas of the farm I expected to see buck activity and let them soak for the entire season.
What I found was that the majority of the farm is home to does for most of the year. Then, as the rut heats up, the bucks move in and tear up the area with scrapes and rubs, then more or less abandon it as the rut begins to wind down. At any other time of the year, the small property is essentially a ghost town for buck activity.
Going into my second year hunting this farm, this intel gives me a leg up and lets me anticipate where the deer will be and how and when to hunt those areas with little guesswork and without wasting time.
Sorting and Organization
Once I know that most of the bucks have shed their antlers, I like to pull all my cameras and begin by sorting through the mountain of data that is six months of trail camera intel. Because it’s time-consuming, I give myself plenty of time to go through and inspect every trail camera photo taken during the last season.
I begin by deleting all of the “junk” photos (i.e., squirrels, fawns, and most doe photos). Then, after most of the fat is trimmed, I circle back and begin sorting.
When sorting through photos, you don’t want to put in the work of sorting through thousands of photos and then put the SD cards right back into the camera with your valuable intel on them, as SD cards can become corrupt and unreadable.
For this reason, it’s helpful to have an external hard drive to export and store all you data on. Plus, it’s easier knowing that all your photos are accessible in one place. I personally use a LaCie 2TB external hard drive. This allows me to neatly store every photo or video I could ever want without needing to delete past data to save space on my hard drive.
Folders
The most important aspect of archiving trail camera photos is organization. When a certain buck shows up, you don’t want to be unable to find those past photos that would help you identify him. In my hard drive, I like having a folder for each property I hunt. Then I will have subfolders for bucks, a folder for certain age classes, and, if I have an extensive history with a specific buck I’m hunting, I’ll make a folder just for him.
Also, I like having separate folders for specific areas of a property to help me to identify when a certain section was hot with activity, and when the deer abandoned it. This can be useful for food sources, bedding areas, rut locations, travel routes, and generally determining where does are going to be during the rut.
Final Thoughts
While it can seem like a big undertaking, keep in mind that this is what I’ve found to work best for me. Everyone I know who logs their trail camera data does it somewhat differently.
Some hunters go so far as to use spreadsheets and crunch numbers, while others take a more minimalist approach and only keep track of mature bucks.
There’s no right or wrong way to do it, just as long as you’re sorting through and organizing your trail camera data in a way that benefits you and gets you one step closer to success next season.