By: Scott Sanderson
The popularity of European mounts has certainly grown in the past decade. Shoulder mounts sure look great but many people are opting for a much more budget friendly alternative. At a fraction of the cost, Euros are a great way to preserve your trophy for years to come.
When it comes to European mounts I certainly do not claim to be an expert, and you can find many other ways to go about doing them. Just search online, and the amount of comments, suggestions, and information will have your head spinning. For me this is a hobby that I enjoy doing, mostly over the long winter months. This is the method I have been using for several years, and I’m happy with the way my Euros turn out. This is by no means the only way to go about doing a European mount. In the end, do what works for you, and you’ll have a neat trophy that you had a hand in creating.
A few years back I harvested a decent buck that I wanted to do a European mount on. Not knowing anything about Dermestid beetles or how to go about doing a European mount, I took to the Internet. Boiling was a messy affair that ended up with me still picking off flesh and potentially having a weakened skull. What to do? BEETLES! On a whim I ordered two hundred fifty beetles online from somewhere in Wisconsin. I then recruited, well, more like conned my neighbor into using his outdoor shed for reasons we will get into later on. To make a long story short, my beetles slowly cleaned that first skull in a plastic bin, and their population was on the rise!
Demanding Little Critters
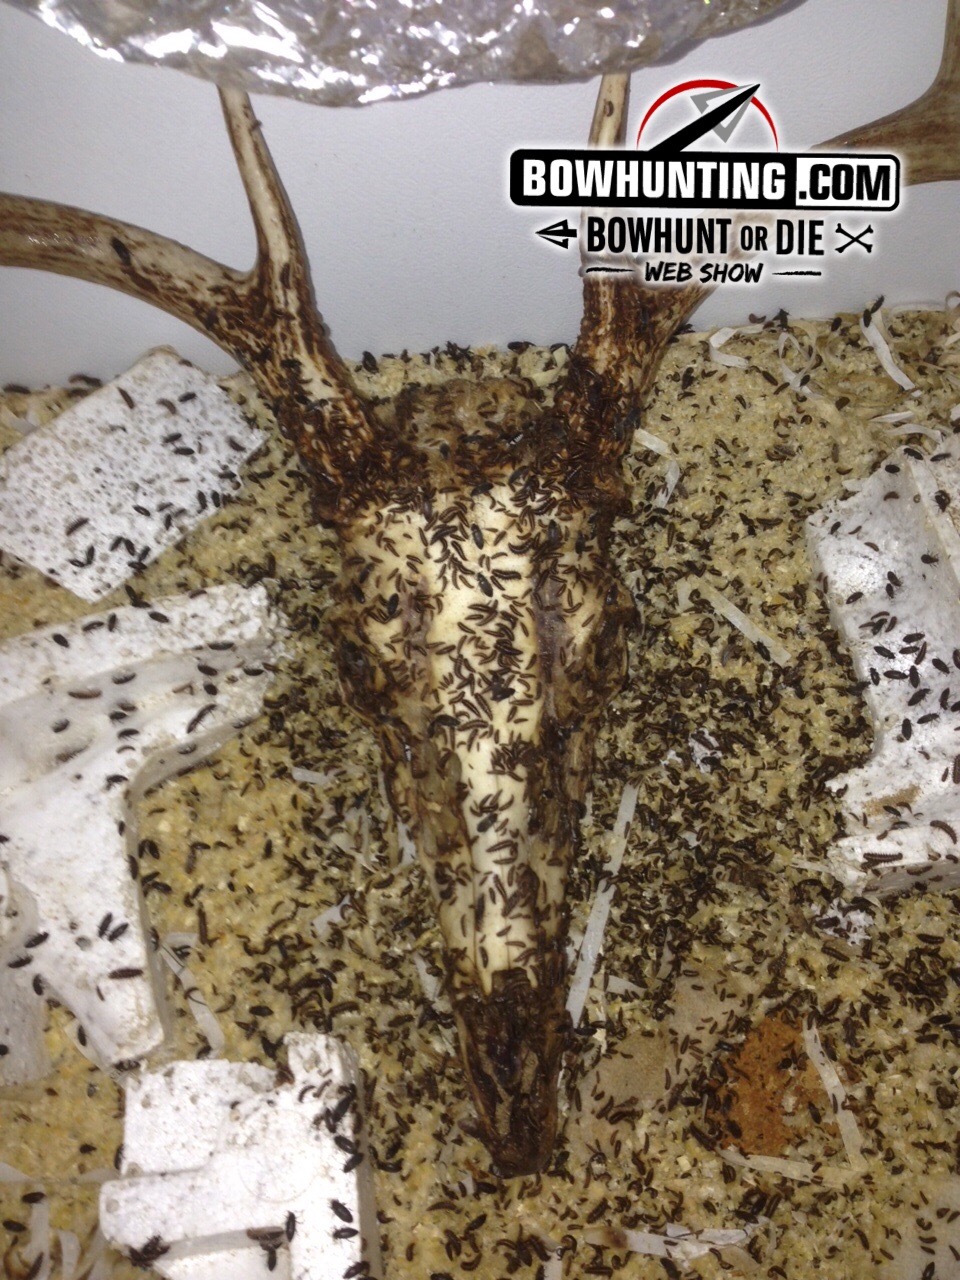
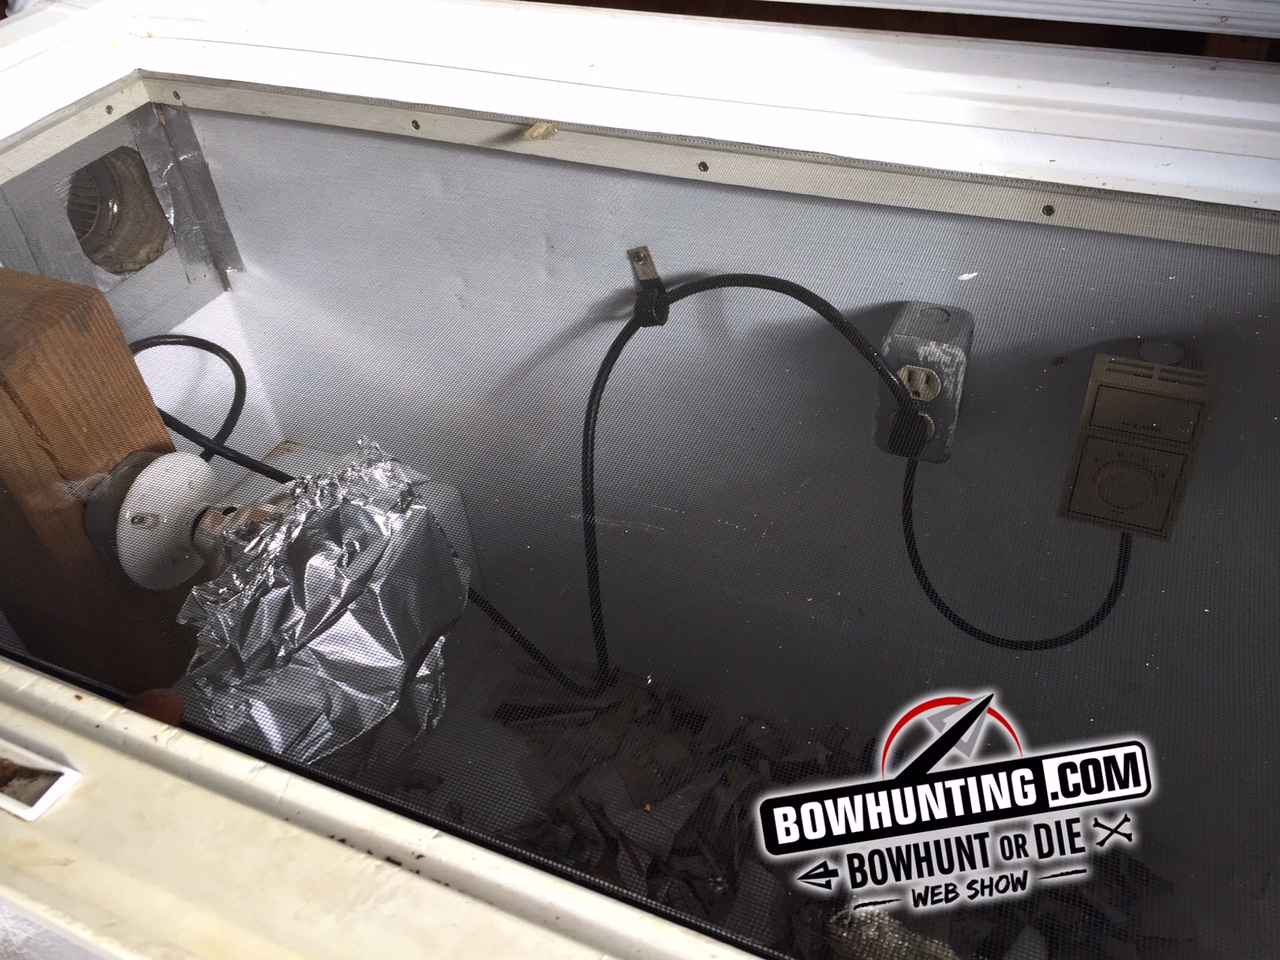
Currently the beetles are still housed in that outdoor shed in a small chest freezer. Simply put, they stink! The freezer seals up nicely and prevents other insects from invading the colony. A mesh screen covers the top under the lid with a slight gap for ventilation. There is also a hole drilled near the bottom in case a humidistat would need to be hooked up. This allows some air ventilation near the bottom even though the humidistat was never needed. The humidity level shouldn’t exceed 50%. If so mites and mold may become an issue. The beetles get misted daily with a spray bottle. The temperature stays between 75-80 degrees Fahrenheit. A heat lamp is hooked up to a thermostat for climate control. They prefer a darker environment so the lamp is covered with foil. These critters like to burrow into Styrofoam to lay eggs. The small larva eat as well as the beetles. In fact, they play an important role getting in all the nooks and crannies of the sinus cavity. The freezer does need periodic cleaning. There is a buildup of frass, or excrement from the beetles and larva. In the offseason they feed on old freezer burnt meat.
Skull Prep
Before putting the head into the beetles, the entire hide is removed from the skull. Excess meat, eyes, tongue, and brains are also removed. After several skulls this process goes much quicker. For the best degreasing results, the hide and excess material should be removed as early as you can. Fats and oils can soak deeper into the skull the longer you wait and makes degreasing that much more time consuming. Obviously, the more you can remove from the skull the faster the beetles will strip it. By removing all of that excess material, you are drastically reducing a big moisture spike which can harm the beetles. Depending on the beetle population, more than one skull may be cleaned at the same time. I have had four in at a time. However there is a limit to what they can handle. For my neighbor and I, this whole process was trial and error, learning each step of the way. With a booming population, the beetles will strip an entire deer skull in a little over a day. However, in the winter, skulls may need removed from the beetles and resoaked to get moisture back into the tissue. At times the air is very dry and they cannot feast fast enough. The tissue becomes rock hard. Also, if I suspect a head may be contaminated by other insects I will put the head in scalding water or freeze it to kill any potential invasive threats to the colony.
Degreasing
The amount of grease in the skull varies greatly even among the same species. The bottom line is that the majority of the grease needs to be removed or yellowing will eventually set in. This can take a few weeks to a few months or longer. When the skull is pulled from the beetles I immediately hose it down and get it into hot soapy Dawn water to soak. I use aquarium heaters running on high in little buckets. I’m simply heating Dawn water and letting them soak in temps around 100F. Ideally, I’d like to be soaking them in slightly higher temperatures, but my previous method using bucket heaters cranked up our electric bill and was not cost effective. I keep changing the buckets as they get cloudy and grease and fat float to the surface. This is the time consuming part and many bucket changes are needed before the skull is degreased and your Dawn water stays clear. I have a small degreasing and whitening room in my basement. The initial degreasing right from the beetles can be pretty smelly. In my sealed off room I have house wrap on the walls and a powerful exhaust fan which contains the moisture and any odor. There are two sinks for hosing, dumping, and refreshing the water.
Whitening
Once the skull is thoroughly degreased and dried out, it is time to whiten. I get my supplies at Sally Beauty Supply or online. Online is usually cheaper unless Sally is running a special. Using Basic White 2 powder, I mix it with Volume 40 Crème (12% peroxide). I look for a thick liquid consistency for good absorption into the skull. I paint it all over the skull, and cover it good. The antler bases need to stay clear of the mixture or it will whiten. Gloves are a good idea as this is a pretty potent mixture. I immediately cover the skull in plastic wrap. This allows the concoction to work its ways into the bone more before drying out. I have even used a heat lamp to better activate the mixture. I get good results whether I use it or not. Depending on the skull, I might repeat this step three times. Hose the skull off after each whitening, and let it dry before applying more of the mixture. If any teeth fall out during the process this is when I glue them in. A simple clear crazy glue works great. I also use a Dremel tool for chipping out any discoloration or crud left in the teeth.
[ChemicalforBeetles Photo Here]
Mounting
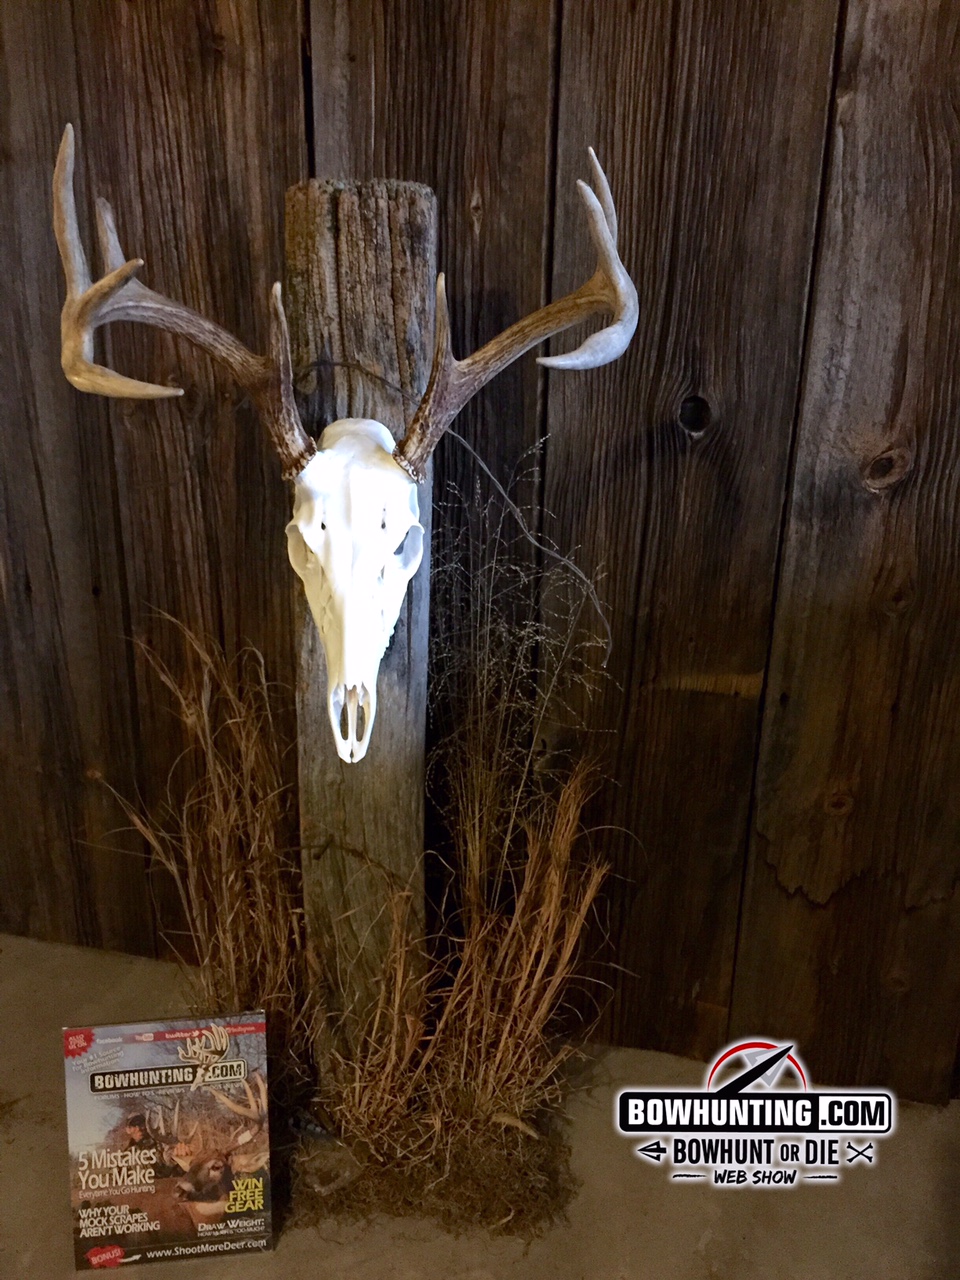
There a lot of different ways to display Euros. Many companies have come up with unique wall hooks for hanging them. Some people simply like to set them around or display them next to a neat piece of wood or an old stump. I like to find old locust fence posts and use them to hang the euro on. I cut the post down and mount it to a board. Then I use dried grasses, moss, rocks, and a variety of plants to mimic an old fence post scene. We have used old weathered barn wood to make outlining Euro plaques as well. The sky is the limit!
A Few Things to Consider
Before you jump online and order your beetles, just a few things to keep in mind. This is a smelly and messy affair! Most of the smell comes from the beetles feasting in the chest freezer. This is not something you want in your basement! Period. My wife shut down my initial degreasing operation in our basement as the smell was seeping up into the house! That is when the degreasing/whitening room was added. It is a lot of work! My neighbor houses the beetles in his shed where he cares for them. I focus on the degreasing and whitening. Splitting the job makes it a lot more manageable. Like I said before, we have learned so much by trial and error. I also purchase a $100 taxidermy license each year from the Department of Agriculture. I do not consider myself a taxidermist, I’ll leave that up to the professionals. However, rules are rules, and I needed the license. Be sure to check your state’s laws and regulations. You will also have the cost of chemicals, buckets, heaters, tools, etc…
Despite the smell and initial set up work, it has been a fun and rewarding hobby. Word quickly spreads among family, friends, and others that you have bugs! Heads start showing up here and there. It has also put me closer to some great bucks. Admiring and working on others’ successes has been a fun way to connect with other hunters. Being able to preserve and display these trophies is a nice way to pay tribute to the animals we love to pursue.