LAST UPDATED: May 1st, 2015
How many times have you found that your arrows just aren’t grouping well when you know you are shooting great shots? It’s happened to all of us at one point or another, sometimes after an initial setup on a new bow, and sometimes after you have let the bow sit during the off season. After many years of setting up and tuning bows I’ve found that if I check 5 specific things every time I encounter a problem or setup a new bow, I can obtain perfect arrow flight and better groups pretty quickly.
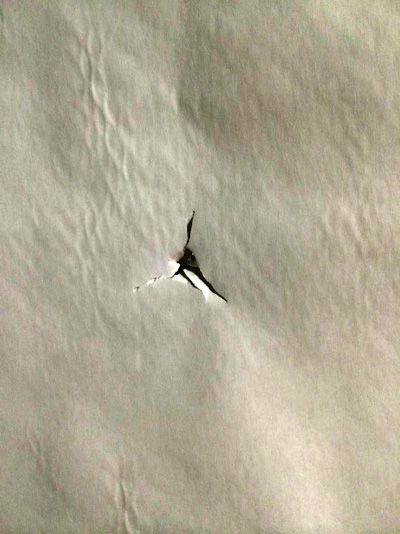
A perfect paper tear is a beautiful thing. These 5 tips will help you get there sooner than later.
TIP 1: Check Arrow Spine & Selection
The first thing I always do when planning a new setup or trouble shooting someone else’s setup is run the bow and arrow selection through OnTarget2. If you’re not familar with this handy computer program it is designed to help archers test and determine the best arrows for their setup (among other things). For the price of a pack of broadheads you can have literally hundreds of hours of testing data at your fingertips and the ability to always select the perfect arrow the first time. With a few mouse clicks you will have the correct spine deflection, a very accurate speed estimate, a kinetic energy calculation, and even your exact front of center for the planned setup.
In addition to all this, you will know exactly how long to cut the shaft and what exact draw weight your bow should be for the planned arrow if you want to dial it in perfectly. There are a handful of similar products out there as well including Archers Advantage and The Archery Program (TAP), however I’ve used OnTarget2 for years and I’m always amazed at how accurate it is.
Without the proper arrow size and spine for your setup, you’ll never shoot as well as you want so this is a great place to start.
TIP 2: Check For Fletching Contact
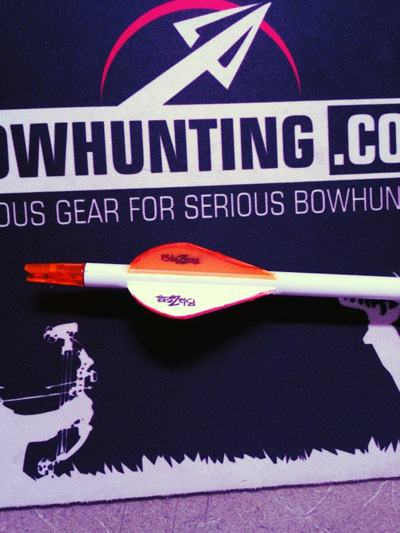
While I don’t see fletching contact often, it can have some pretty drastic effects on arrow flight when it occurs. It’s one of those things that many people don’t initially look for when troubleshooting a setup but it’s actually pretty easy to identify. Steal a tube of your wife’s bright red lipstick and put a red stripe on the very outside edge of your vanes and then shoot an arrow. It will be very apparent after a single shot if there is fletching contact, the lipstick will be left on the bow or rest in the exact spot where it’s hitting.
Once you have identified that you have contact, check your bow for proper centershot and nock height that could be causing this. You may also want to check a dropaway rest to ensure it’s timed per manufacturer specification. If your rest isn’t dropping out of the way quick enough this can cause fletching contact issues.
TIP 3: Arrow Straightness & Alignment
Arrow straightness and broadhead/nock alignment are also factors in great arrow flight. Field points will often cover these up on a poorly setup arrow, but it can quickly become a problem when you put broadheads on.
To start, select an arrow that has good straightness tolerances out of the box. Most of the premium arrows on the market today offer .001 or .002 straightness tolerances. Make sure you cut evenly from both ends of the shaft when building the arrows. Most of the runout that occurs in an arrow shaft occurs in the last 1”-2” on each end. If you cut from both ends, you eliminate the part of the shaft that is most likely to cause you problems. Many archers make the mistake of only cutting from a single end which isn’t the optimal solution.
After you have cut from both ends of the arrow use a tool like the G5 Arrow Squaring Device to properly square both ends of the shaft. This will ensure everything is perfectly square before you install the insert or nock. Once the shaft is square, install your insert and again use the Arrow Squaring device to ensure the outside surface of the insert is square as well.
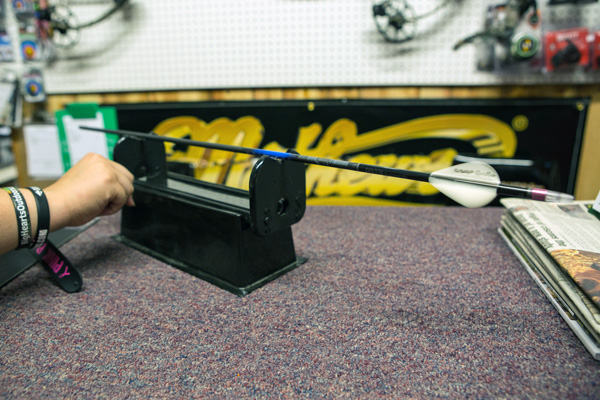
Once your insert, broadhead, and nocks are installed, spin the arrows on a tool like the Pine Ridge Arrow Inspector to ensure the nock and broadhead are perfectly aligned. If they don’t spin, swap the nock or broadhead with another and try spinning again. If you can’t get them to spin after trying a couple of different heads and/or nocks, mark that arrow and only use it for field points. Don’t be surprised if you get a couple arrows per dozen that just won’t spin properly, it’s pretty common with even the highest end carbon arrows to have one or two that just won’t align properly in every dozen.
Spin your arrow to check for nock and broadhead wobble. If you have any try replacing your components first. If that doesn’t fix the issue the arrow may not be suitable to hunt with.
TIP 4: String Creep & Cam Timing
Whether you are working with a new bow or one that’s been previously tuned don’t be surprised if the string and cable setups creep a bit causing cam timing and synchronization issues. Make sure you change your string and cables at least every two years and sooner if you are shooting a lot.
Many bows won’t show significant problems with timing until the shooter starts to creep in the valley a bit and execute shots that vary a bit in draw length and anchor point. This can start to become apparent when you are shooting up/down hill or on bad footing like what occurs in many hunting situations. If you video tape a shooter it’s pretty common to see them execute shots from different spots in the valley of their draw cycle. Even a small 1/16” to 1/8” variation on this with a bow that isn’t properly timed can cause high and low fliers in your group. If you start to notice a lot of vertical stringing of your groups this can quickly be diagnosed by doing a “Creep Tune”.
To properly check your cam timing and creep tune the bow, follow these steps:
- Make sure the bow is sighted in perfectly for 20 yards.
- Set the timing as close as you can by eye. A draw board can be extremely helpful for this, but if you don’t have access to one you can have a friend visually check both cams position just before you hit the back of the valley in your draw cycle.
- Put a horizontal strip of 1” wide masking tape on your 20 yard target. It’s important that this tape be fairly level.
- From 20 yards, shoot an arrow at the tape. Make sure it’s a perfectly executed shot, if not do it again.
- Again from 20 yards, shoot another arrow at the tape. This time pull hard into the back wall of the draw cycle. A bit harder than you normally would. Make sure it’s a perfectly executed shot, if not do it again.
- Finally, shoot a third arrow at the tape, only this time when you settle in to your anchor point make sure the shot breaks while you are sitting at the front of the valley in the draw cycle, maybe 1/8” shorter than your normal anchor point.
- If the shot that you crept forward on hits low, you will need to add twists to the cable that connects to the top cam.
- If the shot that you crept forward on hits high, you need to add twists to the cable that connects to the bottom cam.
TIP 5: Cam Lean
While it’s not the easiest to fix on many bows, cam lean can cause some pretty significant challenges to your arrow flight due to horizontal nock travel. This can cause side to side stringing of your groups and/or horizontal tears when paper tuning. To see if your bow has cam lean, you can take a known straight arrow and lay it on the side of the cam and see how parallel the arrow shaft lays compared to the string. You can also look at the bow from end to end and see how parallel the cams are to the string.
If you do notice that your setup has some noticeable cam lean, you may be able to correct it depending on what type of cam system you have. Most single cam or hybrid cam designs have a tunable yoke on the top cam or idler wheel where twists can be added or removed. If you have a dual or slaved dual cam bow design with a static yoke system, you can also easily tune those yokes by pressing and twisting the yokes. If you have lean on a single or hybrid cam on the bottom, or a dual cam bow with floating yokes, I’d suggest bringing the bow to your dealer and inquiring if it can be covered by warranty. Often times cams, bearings, or bushings can be replaced in these types of bows to correct the issue. I would also suggest looking at the bow carefully before buying to see if the cams are leaning before you purchase.
Shoot Great!
No one likes finding that their favorite bow isn’t grouping consistently, but if you follow the steps outlined here you should be able to achieve perfect arrow flight pretty quickly. The good news is that most modern bows today are fairly consistent and stay in tune exceptionally well compared to bows manufactured years ago. If you do start to notice some inconsistency or are setting up a new bow, make sure you consider each of the five tips outlined above and you should be back to hitting your mark pretty quickly.
Article contributed by Matt Miller
