LAST UPDATED: May 1st, 2015
As an avid bowhunter and father, there is unquestionably a burning desire in me to pass along my passion for archery and the outdoors to my children. And, just as any parent, I want them to be successful, not only in life, but behind the bowstring as well. This requires a certain amount of knowledge, patience and commitment from both parties involved. And while some “life lessons” can’t be taught, but rather must simply be learned by your child, teaching he or she the basics of archery, and how to be successful at it, is something you can do the moment they pick up a bow and arrow. All it takes are good fundamentals, the right equipment, and an environment conducive to success. Combine those three elements, and you are well on your way to teaching your child a skill they will enjoy for the rest of their lives.
Step One: Establishing Eye Dominance
Before you head down to the pro-shop to pick out that “perfect” bow for your young one, you first need to conduct a very important, yet often overlooked, test. The purpose of this test is to determine which eye is your child’s most dominant. This is a vital step for accurate shooting since the bowstring should be directly in front of the predominant eye. Most parents mistakenly assume that their child’s dominant eye will coincide with their dominant hand. But that isn’t always the case. Therefore, eye dominance should be established before any decisions are made regarding equipment. The easiest way to do that is with the following method.
Determining whether or not your child should shoot right or left handed depends solely on eye dominance. This can be determined with a simple test and will greatly enhance the youngster’s ability to accurately shoot a bow.
• Have your child extend both hands forward, placing them together to form a small triangle between the thumbs and the first knuckle on the index fingers.
• With both eyes open, have them look through the triangle and center a particular object such as a doorknob, light bulb, rock, etc.
• Next, have them close their left eye. If the object stays centered in the triangle, they are right-eye dominant. If the triangle appears to move off of the object, making it no longer visible, then they are left-eye dominant.
• To further validate your findings, have the child perform the test again. Only this time have them close their right eye first. If the object remains in view, they are left-eye dominant. If the object is no longer visible, they are right-eye dominant.
This test can also be performed in a similar fashion by pointing the index finger at an object and then closing your left eye. If your finger stays on the object, then you are right-eye dominant.
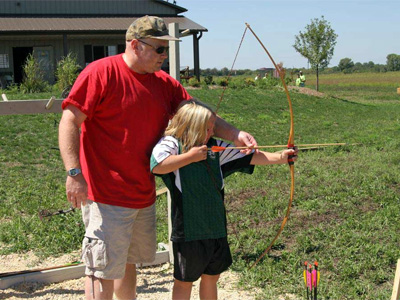
Step Two: Proper Draw Length and Draw Weight
One of the most important aspects to consider when setting up your child with his/her first bow is to make sure they are comfortable. Remember, the act of shooting a bow is completely new to them, so it is important that the bow itself doesn’t hinder their enjoyment. This usually occurs by forcing the child to shoot a bow that is either too long for them (draw length) or too heavy to pull back comfortably (draw weight); sometimes even both.
The wing-span method is a simple procedure used in order to establish a starting point for your child’s proper draw length measurement. Of course, some fine tuning may be needed but this method will put you very close to the actual number. To begin, simply have your child stand with their back against a wall, arms extended outward. Then, measure their “wingspan” from fingertip to fingertip. Take that measurement and divide it by 2.5. This will give you a “rough” draw length. For example, 45” (wingspan)/2.5 = 18” draw length. Remember, correct draw length is an important component in proper shooting form. Without proper form, accuracy will suffer and enthusiasm to participate will be stifled.
Likewise, when it comes to correct draw weight, focus on comfort. If your child struggles to reach full draw, or if they must use erratic drawing motions to do so, then the poundage is too high. Another simple test to determine if draw weight is too great is to have the shooter sit in a chair with their legs open and the bow straight out in front of them. While in this position, have your child attempt to come to full draw. If they can’t draw the bow back without raising it 4-6 inches above their line-of-site, they are most likely shooting too much weight. Lowering the poundage will allow them to draw the bow back smoothly and in a more relaxed manner.
Step Three: Setting the Stage for Success
It is always important that your child be successful whenever they are learning a new skill for the first time. Archery is no different. After all, failure does not foster repeated efforts, especially in children. In order to set the stage for success, begin with the proper bow accessories and end with an emphasis on fun—not results.
Simple Accessories Equal Successful Shooting
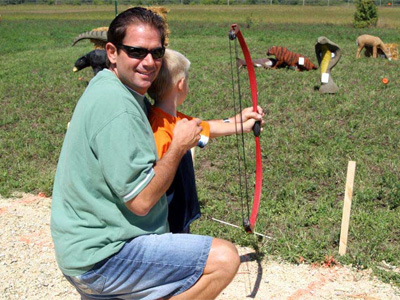
Now that you have established eye dominance and correct draw length/bow weight, it is time to outfit the bow. Does your new shooter need a seven pin sight with 3rd axis adjustment, or a high-tech drop away arrow rest in order to shoot accurately? No. In fact, too much technology will only lead to confusion and uncomfortable shooting. For the “first-timer”, draw, aim, and shoot should be as complicated as it gets. Therefore, it is important to attach the simplest accessories possible to your child’s bow.
Some children will not enjoy using a peep- sight during the initial stages of learning to shoot a bow, and that’s OK. A simple kisser button will ensure that young shooters remain accurate and consistent until the time is right to re-introduce the peep-sight.
Start with a bright, single pin sight. This will clear up the sight picture and reduce your child’s anxiety over choosing the wrong pin. And when it comes to arrow rests, it’s hard to beat the “just load the arrow and shoot” whisker-style rests. Not only are they simple to use, it is impossible for the arrow to fall out; giving beginners one less thing to worry about.
A few additional add-ons to consider are the kisser button and the bow sling. The kisser button gives the shooter a second point of reference when aiming and also ensures that their head isn’t tilted differently every time they shoot. This will help establish a repeatable anchor point, which will lead to greater accuracy and overall enjoyment. The purpose of the bow sling is to promote a relaxed shooting hand; one that encourages the fingers to simply fall around the front of the riser. Because muscle tension will erode accuracy, especially if a “white-knuckle” grip is present, it is important to eliminate this bad habit in the beginning stages of shooting. The bow sling will do this by assuring your child that they will not drop the bow.
Short on Attention
When you or I get a new bow we can’t spend enough time shooting it. Children, however, are completely different. The duration of their shooting sessions should not be based on our own enthusiasm, but rather, it should revolve around their attention span; which, as it turns out, is exceptionally shorter than ours.
Understand that some days your child may want to shoot 5 arrows, some days he or she may feel like shooting 25. Either way, limit arrows or time spent shooting to their own needs and wants and the process of shooting the bow will likely remain fresh and exciting to them. Also, don’t try to teach your child everything you know at once. It took years for you to acquire your knowledge up to this point. Don’t expect a beginner to absorb all of your wisdom in a few short outings. Instead, be patient and cover the basics such as proper form, relaxed bow hand, picking a spot, and a smooth release. Save the advanced shooting techniques for later; after a good foundation has been built.
The Name of the Game
Like any child, your new shooter wants to have fun. If shooting the bow isn’t fun, they won’t want to do it….no matter how badly you may want them to. To keep the “fun” level high, you must first set them up for success with the proper bow and accessories (as discussed), and then, create a shooting environment that focuses more on having fun, rather than cutting X’s. Luckily, there are a number of archery games that can help you accomplish this.
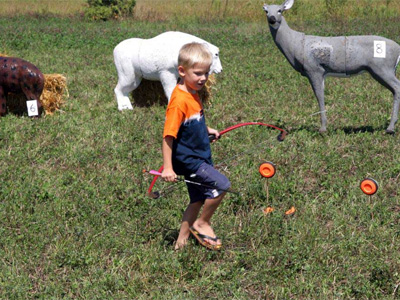
Children don’t care about score or the number of X’s shot. To them, the name of the game is fun. Make shooting an enjoyable experience and the child will likely participate in archery throughout their lifetime.
Such activities include Tic Tac Toe, Pin the Tail on the Deer, Water Balloons, Candy Shoot, and the list goes on. The rules and procedures for these, and a host of others, can easily be researched “on-line”. In addition, remember that archery activities are only limited by your own mind. As long as they are safe, and your child enjoys them, you can make up your own games if you wish. You can even get your kid involved in the creation process. This will expose them to critical thinking as well as problem solving activities; building confidence in an entirely different area of their life.
Conclusion
Archery is a wonderful sport. It teaches and encourages hand-eye coordination, discipline, patience, confidence, and focus, just to name a few. When taken to the next level, that of the bowhunter, your child will learn to respect the outdoors and all of Gods creatures that inhabit it. They will also understand the meaning of hard work, conservationism, humility and the overwhelming sense of pride felt by setting goals and accomplishing them. I ask what better life-skill is there to pass down to the next generation. Give a youngster the gift of archery and you will know the answer to that question.