You’ve just shot the buck of a lifetime and you want to preserve that memory by having the deer mounted. But the taxidermist wants it caped out before you bring the deer to them. How is it done? What are the proper procedures to caping a deer? What do you do? Follow these steps and you’ll be on your way to the taxidermist in no time.
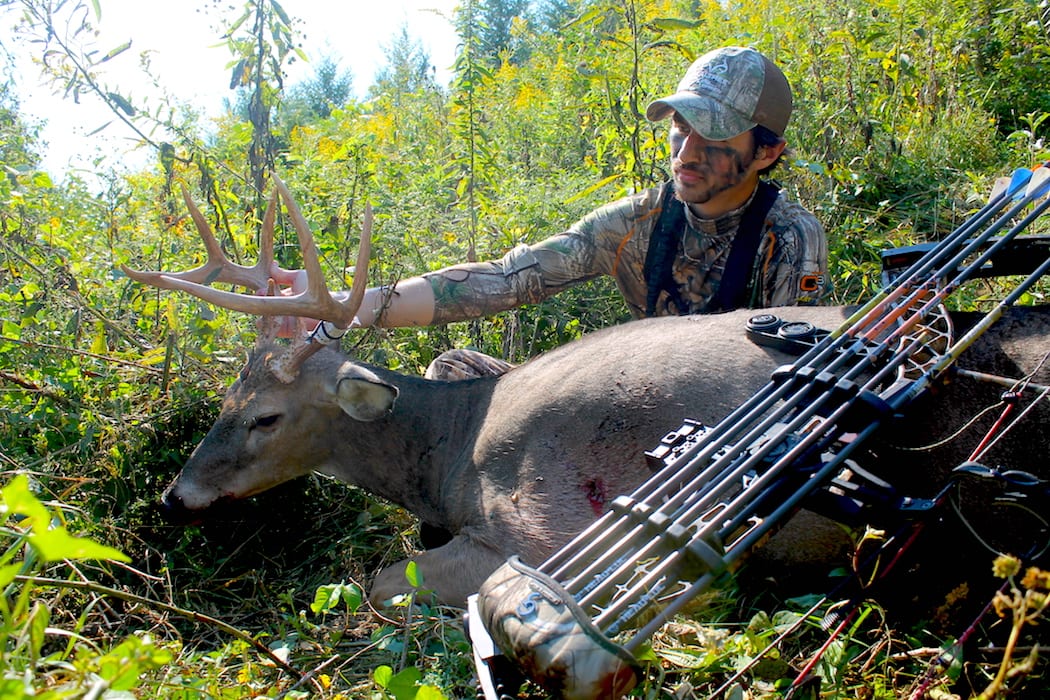
Your tag is punched. Now it’s time to get to work.
Step 1: Sharpen the Knives
The first thing to do is make sure the knife you are using is a sharp one. There’s nothing worse than trying to cape a deer with a dull blade. You run the risk of messing up the cape by using a dull knife.
Step 2: The First Cut
Begin the caping process by making a cut all the way around the buck’s torso. This cut should be made halfway between the front and back legs and should go down the rib cage, across the belly, up the opposite rub cage, across the back, and should finish where the cut began.
Step 3: The Legs
Once the first cut is finished, it’s time for the legs. Make a cut just above the knee that goes all the way around the front leg. Repeat this process on the opposite front leg.
Step 4: Connect the Cuts
Now that you have circular cuts around the torso and both front legs, it’s time for the next step. Cut down the back of the front leg in a straight line. Start the cut where you cut around the leg and finish your cut once you reach the cut you made around the torso. A good guide to follow is the distinct line where the brown and white hair meet. Repeat this step on the opposite leg.
Step 5: Skin It
Once you’ve made these cuts, it’s mostly skinning from here. Very carefully begin to skin the hide away from the meat and slowly work the cape off the deer as you move closer to head. No more cuts should be made in the cape at this point. The last cut in the cape was completed in the previous step. Some people will advise you to make a cut in the cape above the spine all the way up the neck to the head. Do not do this unless your taxidermist specifically asks you to. Most modern taxidermists do not want this cut made in the cape. It’s a little harder and more time consuming once you begin skinning up the neck by not cutting up the neck. But hanging the deer upside down for this step will make it much easier as the cape and hide around the neck will hang downward, allowing for easier cutting access.
Step 6: Make a Meat Cut
You’ve caped the deer all the way to the top of the neck. Now, at the base of the head, make a circular cut through the neck meat. All that should remain attached is the spinal column.
Step 7: Separate the Spine
Now that the spinal column is exposed, twist the neck hard to pop it off, or use a bone saw to cut through the spine. Either will work. Be careful not to nick the cape while attempting to remove the spine.
Step 8: Decision Time
Most hunters won’t need to do anything beyond step No. 7. For those people, carefully wrap the cape up and quickly transport it to your taxidermist. If you can’t take it right away, wrap it up in a bag and put it in the freezer. Make sure you don’t allow the nose or ears to touch anything already frozen (wrap them up, too).
For those who want or need to cape the hide all the way off the skull, find a very small, sharp blade to continue on with. A scalpel works really well for the remaining steps.
Step 9: The Y Cut
You’ve caped the deer off the body and neck. Now for the harder part. Begin by making a 3-inch cut from the back of the antler base back toward the neck. Repeat this step on the other antler base. The two cuts should form a V shape. Now, starting at the base of the V cut, make another 4-inch cut down the back of the neck. What you’re left with is a Y cut. Once these three cuts are made, do not make any more cuts in the cape. You’re simply separating the hide from cartilage and meat tissue from here on.
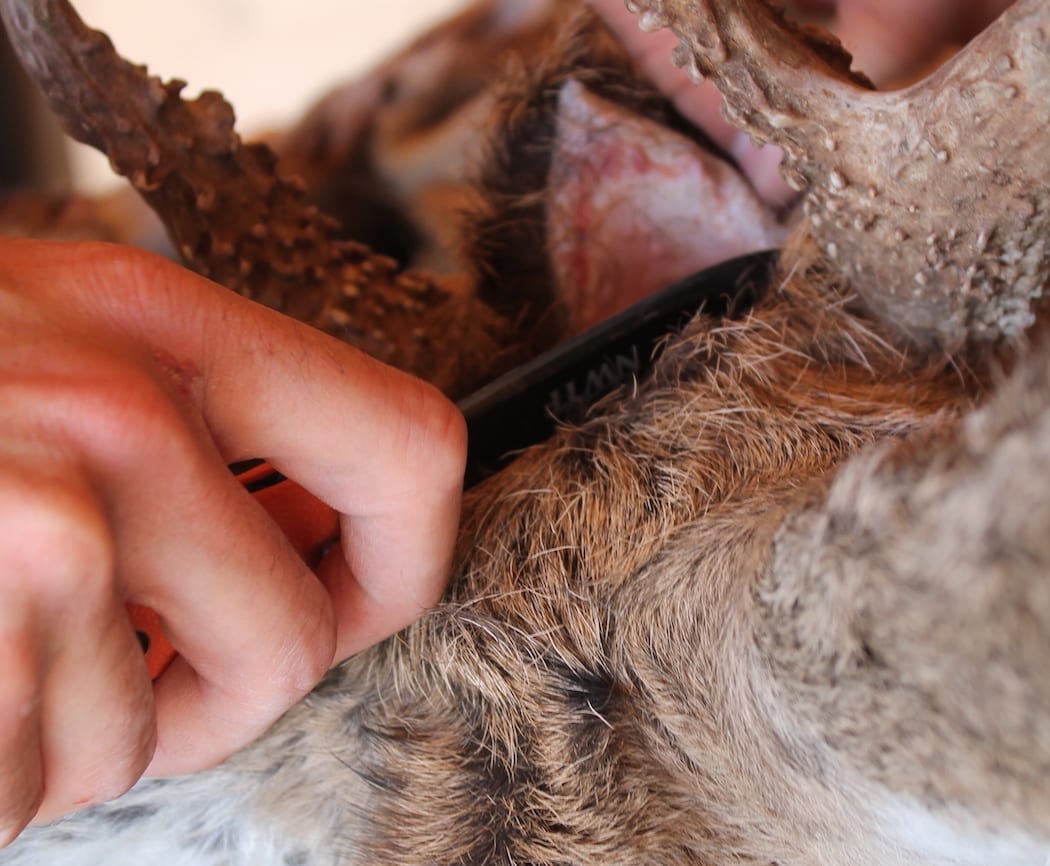
The Y-Cut is the key to “unwrapping” the cape from the skull.
Step 10: Around the Antlers
Slowly separate the cape from the skull around the antlers bases and work the cape downward in each direction to give you room to work for the next step.
Carefully work the hide away from the base of the antlers.
Step 11: Down the Skull
Once you’ve caped it out around the antler bases, now work the cape down the front of the skull, down the sides to the base of each ear, and down the back. However, do not cut through the cape. You’re simply working down the skin flaps that you’ve already cut loose from the initial Y cut and from cutting around the antler bases. Stop once you get to the top of the eyes and the bases of the ears.
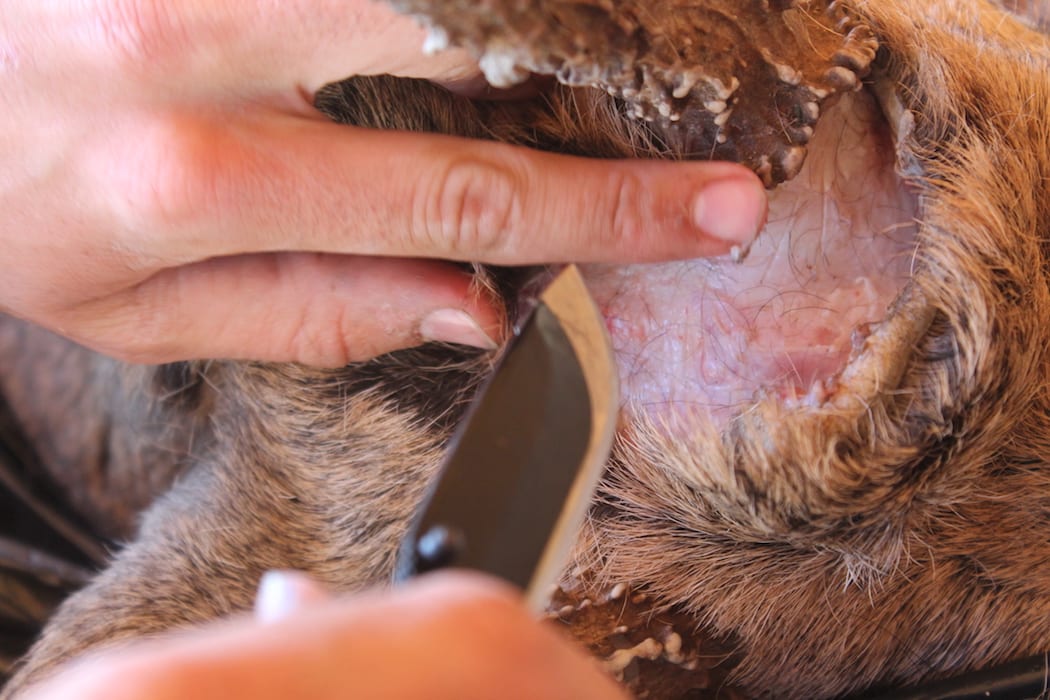
Step 12: The Ears
Now cut through the meat tissue on the ear. Cut through the ear canal, too. The ear should then go limp. Repeat this process on the opposite ear.
Step 13: The eyes
Here’s the hard part. Carefully begin to skin around the eyes without cutting through the cape. Work slowly and carefully. I find it helpful to keep my off-hand fingers around the eye so I can feel how close my knife is to them. Be careful around the corners of the eyes and tear ducts. Those are the two spots easiest to mess up on.
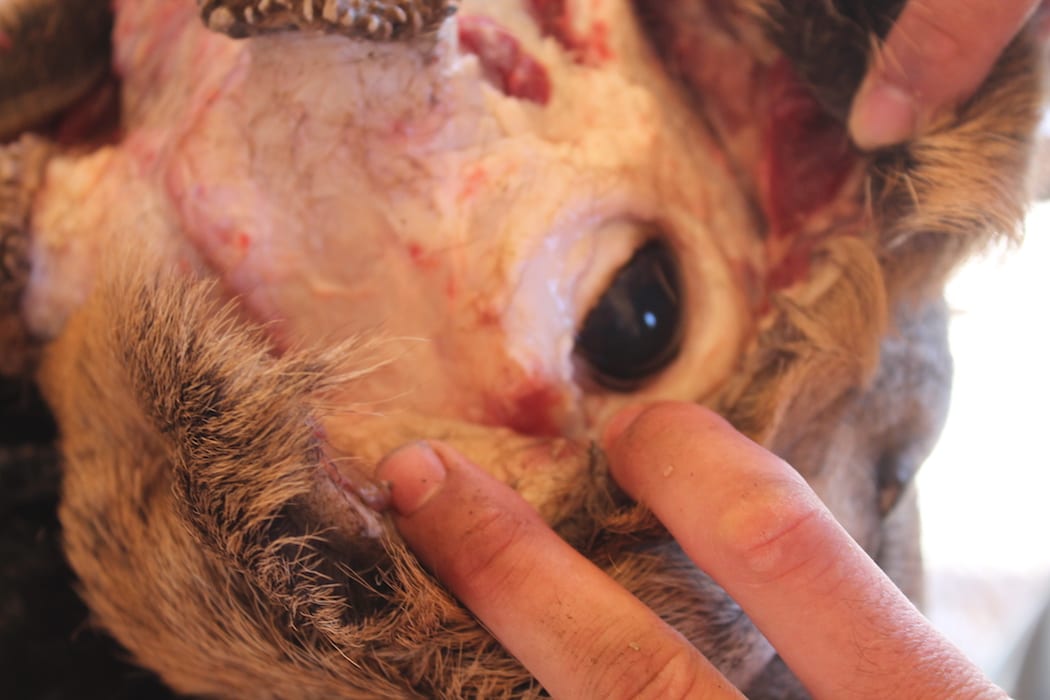
The eyes are the trickiest part of the process. Get around them and you’ve about got it whipped.
Step 14: Down the Face
Once you’ve worked down passed the eyes and ears, keep skinning the hide down the sides of the jaws and bridge of the nose. Take it downward as far as you can until you reach the nose itself.
Step 15: The Bottom Jaw
The deer’s head has been sitting in the “normal” position this entire time thus far. Now, flip the deer up to where the nose is sticking straight up in the air. Open the mouth of the deer. Start on the bottom jaw and carefully cut around the jaw line where the gums meet the jawbone. Leave as much meat and tissue attached to the cape as possible. It’s very easy to leave too much tissue on the skull. Give your taxidermist more to work with. They’ll remove any excess tissue. Keep removing the tissue and work the skin flap on the bottom jaw downward until you reach the top of the neck.
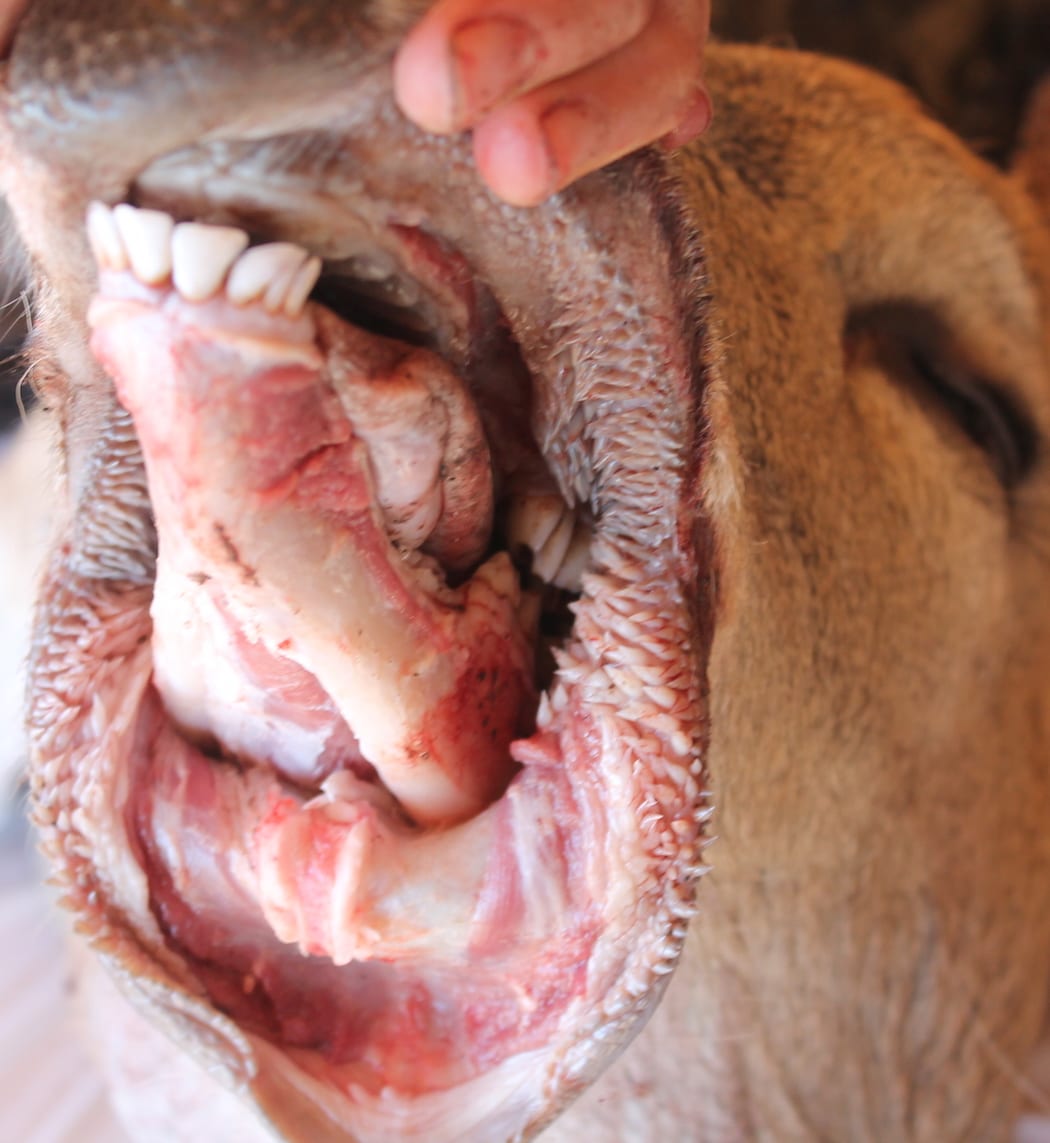
Caping around the lips will be your last hurdle. Take your time and make precise cuts.
Step 16: The Nose
Similar to the previous step, cut where the gums meet the bone. Carefully cut through the cartilage inside the nose, leaving as much of the cartilage and nasal tissue on the cape as possible. Follow the bone on the bridge of the nose as you work upward. Always keep the knife blade angled into the bone instead of into the cape.
Step 17: Remaining Cuts
By now, the majority of the cape should be removed from the skull. Look over the cape and carefully skin the cape away from any remaining connective tissue. Places that generally still need additional caping at this point are the underside of the jaw and back of the neck. Once the cape is free, slide the skull through the initial Y cut made when you first started. Your cape is completed.
Step 18: Remove the Skull Plate
Once your cape is free, remove the antlers by cutting through the skull plate. Make two cuts — one in front of and behind the antler bases — to remove it. Make sure you angle the cut downward and toward the underside of the antler bases, but don’t angle the cut so much that you cut the antlers off without the skull plate. You want to leave the antlers connected to the skull plate to retain their true, natural positioning. Once the skull plate is off, cut away any meat and tissue and wash it thoroughly.