LAST UPDATED: May 1st, 2015
There is something to be said about having an arrow fly perfectly out of your bow, shot after shot. I like to think that the way one accomplishes this task is a form of art. We all want a setup that is forgiving, easy to shoot and spot on accurate. Achieving perfect flight takes patience and the appropriate tools, along with the proper combination of tuning and quality equipment. The following steps will promote tighter groups and increased confidence in your setup, as well as the satisfaction that comes with building your own arrows.
Given the quality of components available, building your own custom arrows is easy and can increase the overall accuracy of your set up.
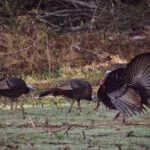
Due to the vast amount of quality arrow manufacturers and various arrow components these days, a lot of thought should go into building arrows. Each arrow component should be well thought out, because arrows are built for your intended purpose, whether it is hunting whitetails on a relative’s farm, or hunting antelope or elk out west. There is a reason for each component and type of arrow based on what animal you are pursuing. Also, two differing methods are either tuning the arrows to your bow or tuning your bow to your arrows. What I mean by this is that you will need to determine the correct arrows to use based on a lot of factors. Both methods can work, and each takes time to achieve the best outcome… I will let you decide what works best for you.
Choose Wisely
Arrows will need to be selected for the proper spine which can be determined by how much draw weight you will be pulling on your bow as well as draw length. You can modify the arrow spine to some degree by playing around with arrow length and front of center (FOC), but you should have a goal in mind before just grabbing any arrow off the shelf. When deciding what shaft is best you can easily use one of the many archery software programs on the market or use certain manufacturer guidelines. This will take the pain and headache out of deciding what arrow will be right for the intended species you’ll be hunting as well as the overall bow setup that you will be using.
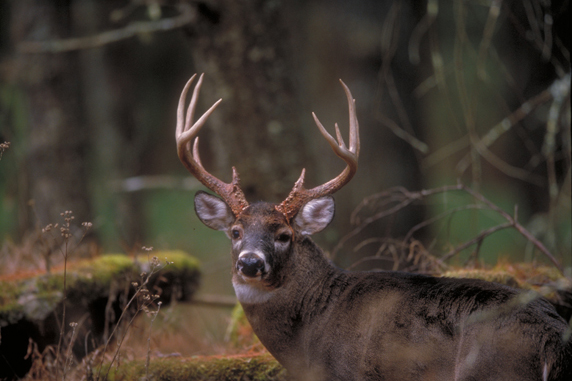
Before choosing an arrow, consider the bow you are using and the animals you intend to hunt with it.
After selecting the arrows for correct straightness and spine you will need to cut the arrows to the correct length. This is where utilizing an archery software program can come into play once again, as you can easily experiment with different arrow lengths, point weights, and fletching options, to name a few.
When cutting arrows, be sure to use a quality saw that is designed for that purpose. Other than for safety reasons, this will aid in providing a true cut. A small tip to keep in mind when cutting arrows: when you receive a dozen or so arrows from a manufacturer, you really don’t know exactly how straight the ends are. Even with high straightness standards across all companies, I feel it is best to cut a little from each end of the shaft when cutting your arrows to proper length. Next, is squaring both ends of the shaft.
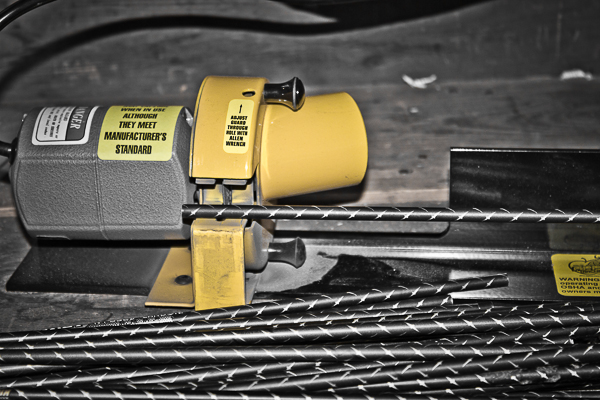
It is important to start with a good, clean, straight cut on both ends of the arrow shaft using a quality arrow cutter.
Squaring Things Up
Start by taking a silver marker (any color will work that is easy to see) and mark the ends of each shaft. Take the shaft and carefully run it in a squaring device until enough material has been removed to get the shaft perfectly square on the nock and point side of the arrow. You will know you have removed enough material and your shaft is square when you can no longer see the silver mark on the end of the shaft. G5 outdoors makes a tool that is perfect for this job; aptly named the Arrow Squaring Decvice. Follow this up by locating a rifle barrel wire brush that will fit on the inside of the arrow shaft to lightly rough up the surface. This will enable your insert to have a secure hold when you reach the gluing step by enabling the epoxy to bond better to the shaft.
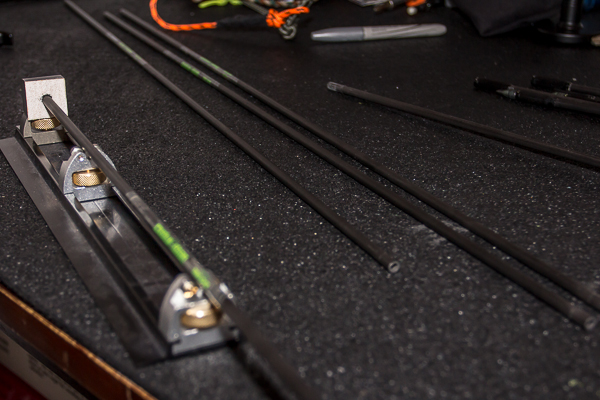
Each end of the arrow shaft must be square in order for the arrow nock and insert to sit properly against the shaft. If not, this will cause accuracy to suffer as the arrow will not spin true.
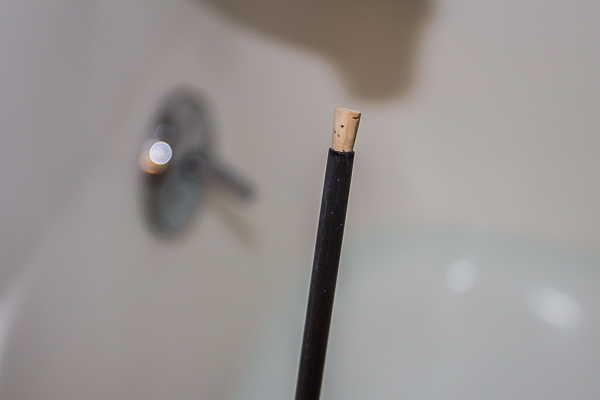
Next, you will need to determine the heavy side, which is usually caused by a seam on the arrow shaft. The easiest way to determine this is by spinning the shafts in a bathtub. Take two small corks that fit in the shaft and plug up each side of the arrow to prevent any water from entering. Next you will need to fill up a bathtub with enough water to adequately spin the shafts (4 inches will be plenty). Once that is done, take some dish soap and poor it into the bathtub in a serpentine pattern up and down the tub. Do not agitate the water to form bubbles on the surface because this will not allow the arrow to spin freely. To avoid this, take your hand and gently place it in the water and carefully run it across the bottom of the tub to mix the soap with the water. Now place the corked arrow in the water and spin the arrow. Once the arrow stops spinning, take note of the side that is up and spin the arrow a few more times to ensure that it stops on the same side each time. After you do this, take the arrow out of the water and place a mark on the side of the shaft near the nock side that was below the surface of the water, as this will be the heavy side of the arrow. Later you will place one of your vanes on this heavy spot to keep all arrows the same.
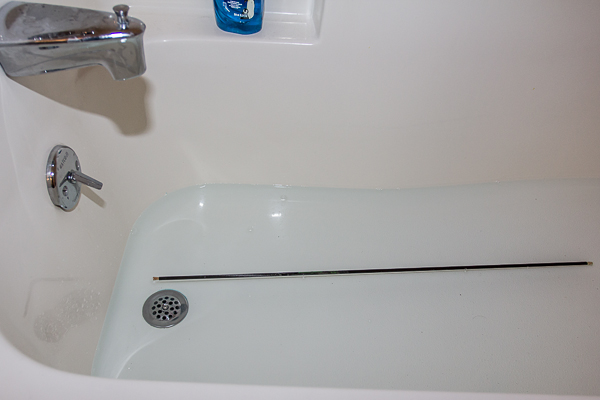
The bath tub method (shown here) is a great way to find the heavy side of each arrow before apllying the fletching. This small detail will ensure that all arrows are fletched in the same manner in conjunction with each arrows characteristics.
Prepping The Shaft
Once you have finished spinning all your arrows, take an SOS pad and place some drops of dish soap on it and place it under running water for a short time while rubbing the SOS pad on the fletching side of the arrow to roughen it up and remove oils to allow the fletching and/or wrap to adhere better.
Let the arrows air dry and follow up by dipping the nock end and point end of the shaft in 100% pure acetone. It’s also a great idea to dip a q-tip in the acetone and clean out the inside of the shaft on the point and nock side to remove any carbon or aluminum dust. Clean out the shaft a few times until the end of the q-tip is clean. This ensures that the shaft will be free of foreign materials when you glue the insert into the shaft. Once again, let this air dry. At this time you can apply an arrow wrap if needed for extra weight or if you just want to add a personalized touch to your arrows.
Sorting The Components
When weighing and sorting components, you will want to pay close attention to details. This is all done in order to create arrows that will weigh within a few grains of each other. You don’t want an arrow weighing 430.2 grains and another arrow weighing 437.0 grains. Therefore, being extra careful and having patience during this process will create arrows that have the potential to be extremely accurate.
It is easiest to let a computer do the sorting, but a pen and paper will also work. Start by taking a small archery scale that is capable of reading in grains and weigh each of your arrows and record their weights. Be sure not to move your arrows after you weigh them, because next you will take those arrows and sort them from heaviest to lightest.

In order to create arrows that are identical to one another you must first determine the weight of each of the components you are working with.
Continue by weighing out all of the arrow components (fletching, nocks, inserts, etc.) and sort them from heaviest to lightest as well. Throughout my testing, I have found some vanes, nocks, and inserts of the same brand/model will vary as much as 0.8 grains in the same package. This way, a heavy shaft will have lighter components and a light arrow will have heavy components. Utilizing a computer will make this easier and you can take a few of the components and add them to your current shaft weight to see what your finished weight may be. This also enables you to see what components should go with what arrow to make them all the same weight. It is easier to create arrows that weigh close to the same weight if you start out with a lot of arrows, rather than building a few arrows here and there in the off season. I prefer to create two dozen arrows at a time. This ensures that I do everything at once and it also aids in having enough components to properly sort everything out in case I need a lighter insert or heavier nock to go with an arrow to match it up with the rest of the arrows.
Now that arrow shafts and components have been selected, weighed and sorted it is time to start the building process. Next time, we will cover fletching options and begin to assemble the components of the arrow in order to create a finished product. Until then…..