LAST UPDATED: May 8th, 2015
After a short hiatus from the site due to work, the holidays and my grandfather’s passing, I’m finally back. Hopefully I was missed by most, if not all of you as I know I definitely missed the whole bh.com crew and their fans. As you may have noticed, I euroed Justin’s and Todd’s antelope for them this year and while I was skinning Justin’s head (that sounds terrible, but I am in fact speaking of his antelope head!), I took a lot of pictures in the hopes of teaching others how to do it. It’s pretty easy and hopefully this will help you next season.
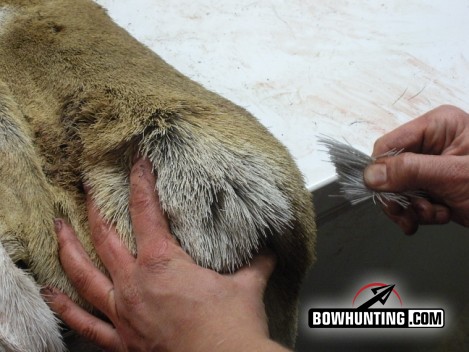
Learning to skin your own animal can be very beneficial to you when you kill that monster buck. You take the time to know all of your gear, your hunt area, and the animal you’re hunting, why not know how to process it so you can get it mounted; and so your taxidermist doesn’t want kill you. If you have the option to freeze the entire head with the hide still attached, you should, but if you kill a 200” deer or even a small elk, you’re not going to get the antlers in a freezer and by the time you get it to someone to skin it, the hide may start to slip. To test whether or not the hide is slipping, simply pull on the hair. If it pulls out, it’s no good. Antelope are some of the worst animals for slipping because their hair is hollow but also because it’s usually so hot when they’re harvested in August and September. Keeping the hide cold is key to keeping the hair from slipping.

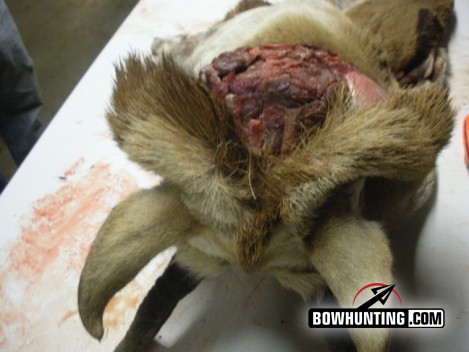
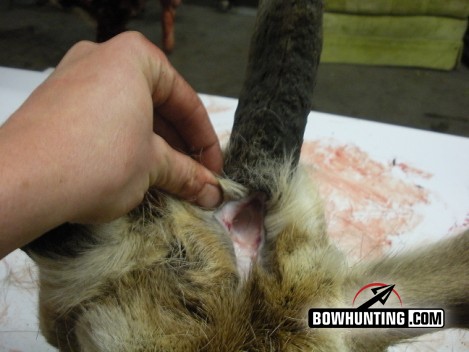
If you opt to skin your trophy yourself, start by making a “Y” cut up the back of the head, branching out to each antler/horn. There are a variety of cuts you can make between the horns but the “Y” seems to be the most common and easiest to sew.
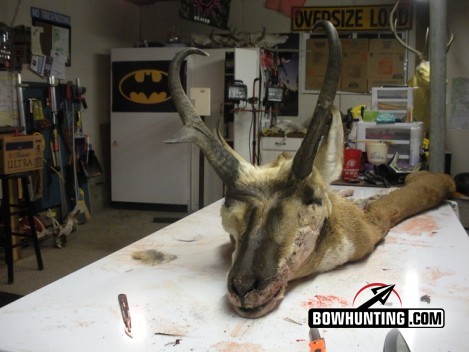
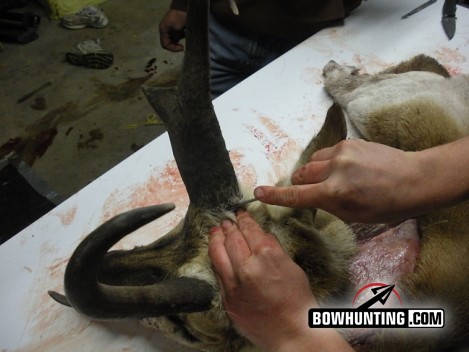
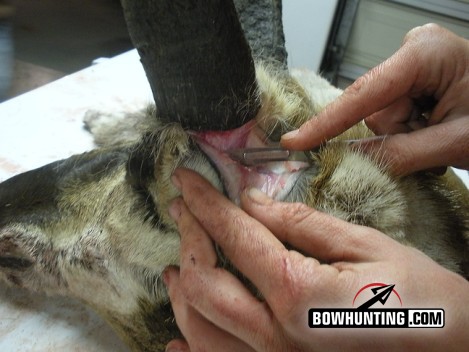
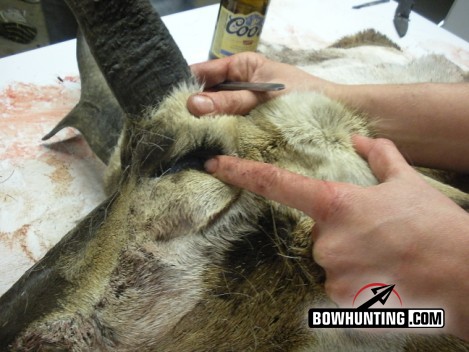
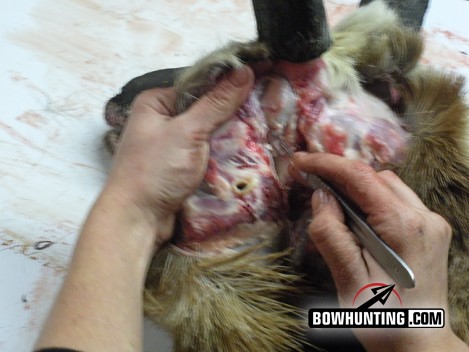
Antler bases can be tricky to remove the skin from and a horn base like what is found on an antelope can be somewhat confusing. Because the horn itself is made from hair, the transition between the hair on the hide and what’s turning into the horn can be hard to find. The base of an antelope horn, however, is soft around the edges and turns very hard as it moves up the horn. You can cut through soft base of the horn, detaching the skin, while turning your knife against the bone in order to detach the skin from the skull. If you’re working on an antlered animal, run your knife along the underside base of the antler, cutting the skin, but not the hair. Again, you will want to turn your knife along the bone in order to cut the skin away from the skull.
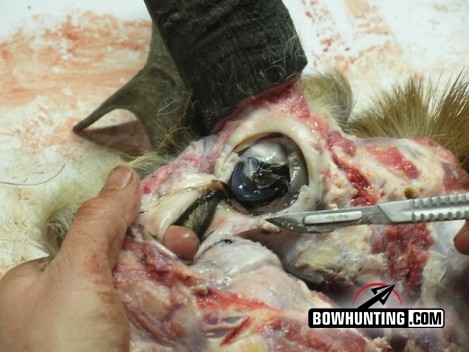
Skinning around the rest of the skull is pretty much the same as skinning anything else; until you get to the eyes. The setting of antelope eyes are much closer to the base of the horns than on a deer or elk so once you get passed the horns, you’ve got to start skinning the eyes right away. This is usually the part where your taxidermist will start cussing you for skinning your animal yourself. Most taxidermists use the inner eye lid to tuck into the form so you want to try to save as much as you can. Sticking your index finger into the animal’s eye and pulling the hide away from the skull while you’re cutting will stretch the skin enough that you will essentially pull the inner eyelid out far enough to start cutting. You will want to cut as close to the eye orbit of the skull as you can, giving you as much eyelid as possible and hopefully giving you a discount from your taxidermist for saving him (or her) the hassle of doing it themselves.
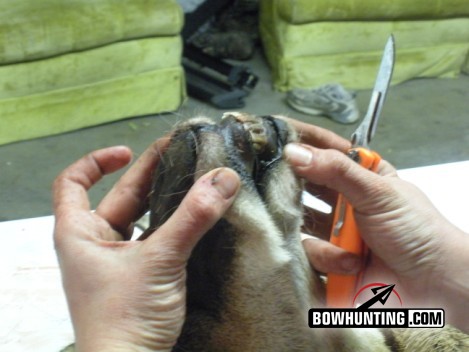
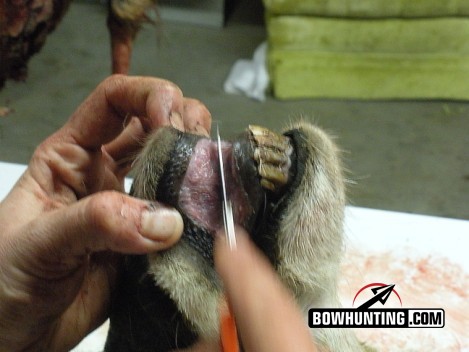
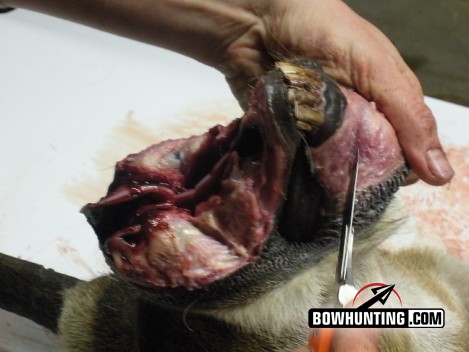
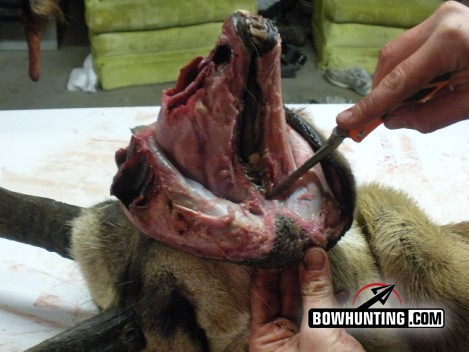
To begin skinning the mouth, pull the lips open, giving you access to where the lip attaches to the gum. You’ll soon start to see the cartilage from the inside of the nose but you can cut right through it leaving about 1.5-2” of cartilage. At this point you can continue skinning the skull until the hide is free from the skull.
Now that you’ve got your hide separate from the skull, you can fold it up, (skin to skin) and throw it in the freezer or even the fridge if you’re taking it to your taxidermist within a few days. Be sure to wrap the hide tightly in a plastic bag in order to avoid air contacting the skin. If the hide is frozen it can get freezer burned easily if there is too much air moving over the hide.
I hope this assists some of you in skinning your own animals and I urge all of you to try it at least once. Try skinning a doe or a small buck your first time so you can get the hang of it if you’re nervous about wrecking your trophy kill. If you have any questions about processing hides or taxidermy work, please feel free to email me at [email protected] and I will be glad to help. I’m definitely not an expert but I know a thing or two and would love to answer any questions. Good luck and have fun!