Broadhead tuning is a technique that is often overlooked but one that can be beneficial to anyone serious about their bowhunting. With the growing popularity of mechanical broadheads, we’ve seen a decreased emphasis on good, old-fashioned tuning skills. No longer is it absolutely essential that your bow and arrows be set up perfectly. You can always just screw in a few scissors-heads and you’re back in business – and back in the kill zone. While there’s nothing wrong with being more accurate in the field (that’s the essence of ethical bowhunting) there are still many bowhunters who won’t switch to mechanical heads for a variety of reasons. For them, the principles of broadhead tuning are far more than simply academic – they are critical to the outcome of the hunt.


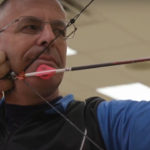
The first step in acheiving great broadhead flight is a properly tuned bow.
When I first graduated to a high performance bow in the late 1980’s I shot aggressive cam bows at very high poundage. I also used big fixed-blade Thunderhead 160 broadheads. Though it took me several days of trial and error, I finally figured out the recipe for making them fly perfectly at 290 fps. It was quite a project, but I learned a lot about broadhead accuracy. I also learned that life is a whole lot easier if you use smaller broadheads and shoot slower arrows! This feature is a step-by-step tutorial for the fixed-blade bowhunters among us. These tips will help you achieve field point accuracay with conventional heads after only a couple of hours on the range.
STEP ONE: CHOOSING THE RIGHT BROADHEADS
All else being equal, the broadhead with the smallest cutting diameter in flight will be the least effected by wind planing. Think of it this way. It is easier to make a paper airplane with small wings fly straight than one with large wings. Fixed-blade replaceable heads in the 1 1/8 to 1 ¼ inch range are a good choice for most bowhunting situations.
I’ve never tested a modern machined replaceable-blade broadhead that wasn’t straight. Any of these has the potential to shoot well from your bow. However, I have tested a few one-piece heads that were woefully crooked right from the manufacturer. In fact, the very first broadhead I tried to use with my first high performance bow was such a head. Not only did they not group with my field points they were so bad that the first one I shot actually hit the ground several feet short of the target! That was a wake-up call.
If you plan to shoot one-piece heads test each and every one before attempting to sight-in. You want only the straightest ones in your quiver. After you’ve gotten one arrow set up perfectly by following the guidelines in Step Three below (using a machined replaceable-blade head as a test unit), screw in each one-piece broadhead and repeat the test. Only those heads that turn true with the point holding solidly to a fixed reference point should be used.
I’m assuming that you’re shooting fixed-blade heads. But, if you’ve left the door open to mechanical heads then you should only consider them for deer sized game if your arrow carries at least 55 ft-lb of kinetic energy. Some broadhead experts don’t recommend them for elk but those who do recommend a minimum of 65 ft-lb of kinetic energy.
STEP TWO: TUNE YOUR BOW
If the arrow leaves the bow tail-high, for example, the broadhead will catch the air causing the arrow to plane downward and impact low on the target. With a poorly tuned bow, you’ll get two groups, one with field points and one with broadheads. To bring the two groups together, your arrows have to leave the bow flying perfectly straight.
At worst, tuning can be a time-consuming and frustrating process of elimination, but I’ve never handled a bow that wasn’t eventually tuned. The sometimes-cantankerous nature of bow tuning is why mechanical heads have become so popular in recent years.
I like paper tuning because the changes needed to get the arrow flying straight are more obvious. The tears are right there for you to read. When shooting a release aid you should be able to attain a perfect bullet-hole through the paper. With a finger release this can be accomplished, as well, but a very slight (half-inch) tear is definitely acceptable. A lot has been written about bow tuning, so instead of rehashing old words I’ve summarized the key elements:
- Make sure your wheels are timed (synchronized to roll over at the same time) if you shoot a two-cam bow. Take it to a pro shop if you’re unsure.
- Adjust your rest so the arrow is center-shot when using a release aid or slightly outside (away from bow) from center if releasing with fingers.
- Shoot through paper at a range of 10 feet.
- Eliminate fletching contact by rotating the nock or going to a less aggressive helical. Carbon arrow shooters should consider four-inch fletching and experiment by rotating the nock to a number of different orientations.
- Move the rest left and right to compensate for tail-right and tail-left paper tears. Nock point and wheel timing (set timing first) can be adjusted to straighten out tail-high or tail-low tears.
- Arrow spine is critical when releasing with fingers so make sure you have properly matched equipment.
- Resize your nocks: If your arrows have nocks of a larger diameter than the shafts, they may hit the rest and kick the arrow when using a release aid. Use smaller nocks.
8.Your grip affects arrow flight. If you can’t eliminate left and right tears, experiment with the way you hold the bow. - Check for rest contact: Some rests don’t provide enough fletching clearance for good arrow flight. If you can’t eliminate fletching contact, experiment with different rest styles.
- Get help: For a more complete guide to tuning techniques you can download a tuning guide from http://www.eastonarchery.com/.

A well-tuned bow is mandatory for accuracy with broadhead-tipped hunting arrows.
STEP THREE: TUNING YOUR ARROWS
Now, hopefully you have a well-tuned bow that is shooting broadhead groups that have approximately the same center point as your field point groups. The next step is to tighten those broadhead groups. If your broadheads have a wider dispersion, the arrows themselves (and their components) are most likely to blame – not the bow or your shooting form. For a hunting arrow to be accurate, all its components must line up perfectly. Again, looking at the paper airplane, the tip and body must be perfectly in line or the plane will veer.
Nocks: It goes without saying that the nock needs to be installed so it’s precisely in-line with the shaft. Most modern indexing nock systems take care of this for you.
Shaft: The arrow shaft must be straight. Keep a dozen shafts aside to be used only for hunting, or take all your arrows to a pro shop to be straightened.
Inserts: If your inserts fit loosely when installed into the shaft, they will not all be perfectly square when the adhesive sets up. Your broadheads can end up pointing in any direction when you screw them in. Even small differences here result in huge differences 20 to 30 yards down-range.
Whenever the broadhead is pointing in a direction other than directly in line with the shaft, it will steer the arrow. This would be like bending the nose of a paper airplane one direction. As I’m sure you know from experience, it will turn and dive dramatically when you throw it. If your inserts aren’t lined up, one arrow might hit four inches high at 20 yards and another six inches low. Such random accuracy is completely unacceptable, and for many bowhunters a major source of headaches.
By squaring the end of each arrow with a device such as G5’s ASD you help insure that each broadhead in your quiver seats squarely with the shaft.
The Arrow Inspector from Pine Ridge Archery is another great tool for bowhunters that helps check the broadhead and nock alignment of your arrow shafts. This easy-to-use tool features two sets of rollers mounted to a plastic housing. Simply set your arrow shaft on the rollers and spin it in order to observe the ends of your arrow. If the tip of your broadhead is not perfectly straight while spinning, then your arrow is either bent or your insert is not straight. Try using the G5 Arrow Squaring Device to correct the alignment issues with your broadhead.
Hopefully, you’ll find enough arrows that have inserts properly installed to meet your hunting needs. (The rest can be used for practice.) If not, replace the inserts in your arrows with better ones. Though I haven’t tried everything on the market, my testing has shown that Easton RPS aluminum inserts, Saunders aluminum inserts and Arizona Archery Enterprises composite inserts are the best available. Of the three, I like the ones from AAE best. They are molded permitting tighter control of tolerances. Their light press fit with the inside of the shaft insures that each will be squarely aligned.
Fletching: A knuckleball is just as unpredictable in archery as it is in baseball. Helical fletching is installed on the arrow at an angle to make it spin and is the only choice for hunting.
As you increase the angle of the helical, you increase the stability of the arrow. But at the same time you make it harder to tune with a release aid (one of the fletchings must slip through the gap in the arrow rest and a high degree of helical makes this more difficult). As a general rule, use the most aggressive helical angle you can and still get your bow to tune. Mail order arrow companies use about three to four degrees of helical (this is also what Easton’s technicians recommend).
STEP FOUR: MICRO-TUNE YOUR ARROW REST

Fine-tune your rest to bring your broadhead groups into the same holes on the target as your field point groups.
Even if your bow is shooting bullet holes through paper and your arrow components are perfectly aligned, your hunting arrows still may not hit the exact same place as your field points. You can either move your sight to account for the small difference, or you can fine-tune your arrow rest.
Bob Mizek, Production Manager for New Archery Products, taught me a simple technique that really works. Its seems like magic, but it’s not. It is simply amazing how much difference tiny changes in rest position have on broadhead group location. Basically, if your broadheads group separately from your field points, move your rest very slightly in the direction you want your hunting arrows to go.
If the broadheads are high or low, left or right of the practice arrows, move the rest very slightly downward or upward, to right or to the left, respectively. I repeat: very slightly. These tweaks are all that’s required to point your broadheads along the right initial path to hit the same place as your field points. Also, expect to move your sight pins very slightly after you finish with this step. But surprisingly, when you’re done your field points and broadheads will hit the same place.
You don’t have to use mechanical broadheads to shoot fast and accurate in the field this season. With a little extra attention to fine tuning, you can be just as accurate with fixed blade heads.