LAST UPDATED: May 1st, 2015
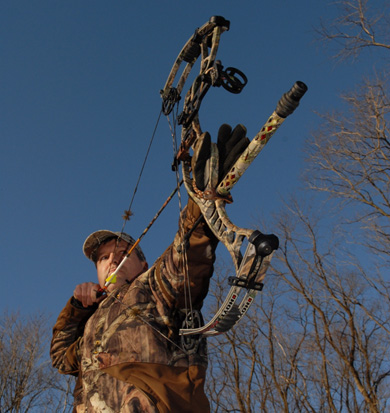
So you want to be a better shot with your bow, eh? Join the club. As bowhunters, we know accuracy is everything. There are so many factors out of our control that have to go our way in order for us to get within bow range of some of the spookiest critters on the planet. However, the one thing we have total control over is how good we are with the “stick and string”. So if the stars align, the gods smile on us and our targeted quarry ventures to within 30 yards or so of our position, it would be a real shame to blow the shot. I know there’s no denying that improved accuracy comes with practice, practice, practice. Slinging lots of arrows is key to finding that bull’s-eye at will. But just because you’re shooting a ton of arrows doesn’t mean you are the most accurate archer you can be. There’s always room for improvement. With that said, if you’re interested in shrinking your groups from that of a paint can lid to something closer to a soda can top, or from a soda can top to a quarter, here are five tips to consider.
TUNING
Is your bow tuned properly? For some of us, that’s a no-brainer. For many others, it might be something you’ve never even considered. Truth be told, if your bow is out of tune you definitely have room for improvement in the accuracy department. As far as I’m concerned, tuning a bow has two facets – timing and center-shot alignment. Both can affect how well you shoot.

Shooting your bow through paper will let you see if your arrow rest and nocking point are centered properly.
Timing refers to the rotation of your bow’s cams. Ideally, you want both cams to rotate exactly the same and to reach full rotation – the back wall – at exactly the same time. If they don’t, then your back wall won’t be rock solid. You’ll feel some play in the string, which is caused by the cam that’s out of sync completing its rotation after the other one. Normally, a couple twists of one cable or the other will bring your cams into sync. All two-cam and cam-and-a-half bows have timing marks that will show you if your bow is timed properly or not. Those timing marks vary widely from brand to brand and bow to bow, so check with your local pro shop to find the marks on your bow. If you’ve got a single-cam bow then timing will never be an issue. That’s one of the advantages of this kind of compound.
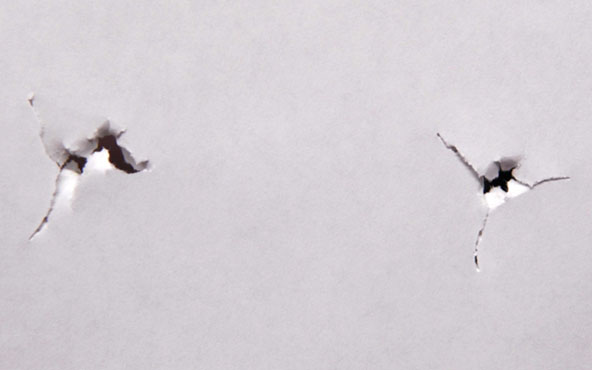
The hole on the left shows the arrow coming off the bow at an angle, with the nock to the left of the point.
The hole to the right shows perfect arrow alignment.
Once your bow is timed properly, shoot an arrow through a sheet of paper placed directly in front of your bow. If your rest and nocking point are centered properly, you should see a bullet hole perfectly framed by your arrow’s fletching. If the bullet hole is high, low, left or right, then you’ve got issues with your rest and/or nock placement. Make adjustments until you get a perfect center shot. If your arrow is leaving the bow at an angle, then you can count on accuracy problems – especially at longer distances.
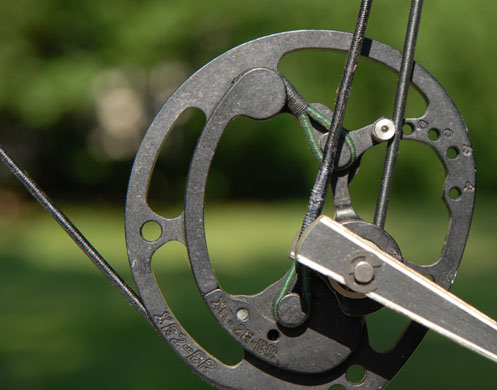
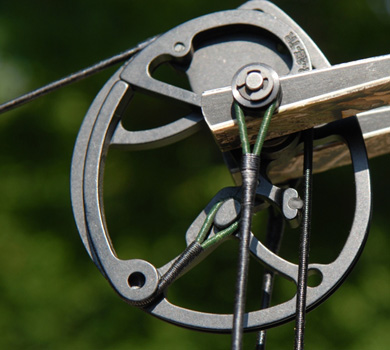
In this photo, there is a metal post touching the string at full draw. The Timing1 photo (below) shows the top cam of a Hoyt bow, while Timing2 shows the bottom cam. When a bow is timed properly, the upper arm and the lower post should both hit the string at the same time when the archer comes to full draw.
FORM
There’s no doubt the No. 1 cause of accuracy problems is poor shooting form. Torquing the bow, dropping your bow arm, punching the trigger, etc., all will send an arrow off its intended mark. You must get your form right or you will always have accuracy problems. Proper form starts with a proper stance. Imagine the target is at 12 o’clock on a clock face. Right-handed shooters shoot stand so they are facing 3 o’clock. Lefties face 9 o’clock. Spread your feet shoulder-width apart. Extend your bow arm and make a V with your forefinger and thumb. The bow should sit in the middle of that V, and then relax your fingers. In that position, the knuckles on your bow hand should extend away from the riser at a downward angle. They should not be straight up and down. If they are, you’re holding the bow grip like it’s a pistol. Don’t do that. With correct hand position, all of the energy released when you release the string should head dead toward the target, along with the arrow.
While at full-draw, the bow should make contact with your shooting hand along the point where the large bones of the forearm met the bones of the hand. Any deviation from this line will cause torque and result in a change in accuracy.
Clip your release to the bowstring and draw back to your anchor point. Keep your drawing elbow up high at full draw, so it’s parallel to the ground. Set off your release by slowly squeezing your shoulder blades together. When the arrow is released, keep your drawing arm moving away from the string, like you’re following through on a golf shot or bat swing. Let the bow fall forward in your hand as you keep your arm up, parallel to the ground. Don’t move your head until you hear the arrow hit. There’s an old archer’s saying that goes, “If you want to see a bad shot, look at it.” What that means is if you move your head to see around your riser the instant your release your bowstring, you’re sure to see your arrow hit off its intended mark. Practice this form over and over until it becomes instinct. If you’re still having trouble, videotape yourself and look for problems, or have someone at your local archery shop watch you shoot and offer pointers.
PUSH YOUR LIMITS
The practice range is the place to challenge yourself. You have to tax your shooting abilities in order to improve them. If all you do is shoot at a 3D deer 20 yards away, you’re only going to get so good. Back up and practice at longer distances than you are normally comfortable shooting – 40, 50, 60 yards. Imperfections in your form will be magnified the farther away from the target you shoot. You can have a little hitch in your bow arm that might push your arrow to the edge of the 10-ring at 20 yards, but it will still stay in the 10-ring. That could lead you to think nothing’s wrong. Well, at 50 yards, that little hitch could push your arrow 6 inches or more outside the 10-ring. You’ll have to correct it to bring that arrow back to the center.
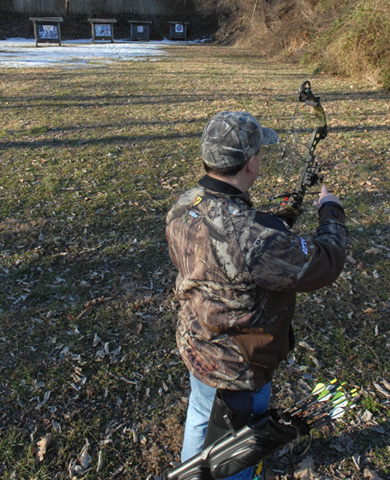
Back up on the practice range to 40, 50 and even 60 yards. This will tighten your form.
To consistently hit the bull’s-eye at 50 and 60 yards, your form has to be dead perfect on every shot. So shooting at those ranges will help tighten your form. Then, when you move in to the 20-yard target, you’ll start busting nocks in the bull’s-eye. If all you have access to is a 20-yard range, you can imitate long-range practice. To do so, simply shrink the size of your bull’s-eye. For example, if you are used to shooting a target with a center the size of a silver dollar, switch to one the size of a quarter. When you can consistently hit that one, paste one up the size of a nickel, and so on. Like shooting at long range, you’ve got to tighten your form in order to consistently hit tiny targets. The margin for error shrinks as you reduce your aiming point. Remember what Mel Gibson told his sons in the movie The Patriot? Aim small, miss small,” he said.
COVER THE BASES
We’re bowhunters. We shoot targets, but we’re not target archers. Well, some of you might be, but for this discussion, we’re all wearing our camo hunter hats. As bowhunters, we need pinpoint accuracy, but we have to be accomplished at putting an arrow precisely where we want it when there is no definable “bull’s-eye.” Think about it this way. If all you do is shoot 3-D targets, you’re never going to develop pinpoint accuracy. You just won’t. You have to shoot at bull’s-eye targets, or some other target with a clearly-visible, small aiming point. Shooting at such targets helps you develop precision.
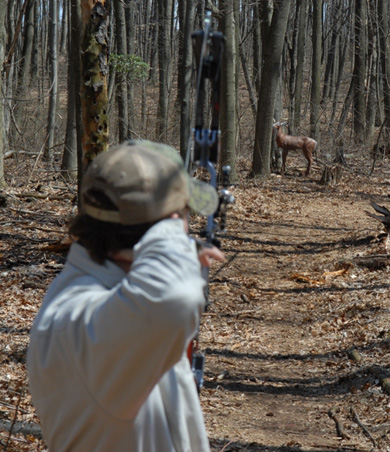
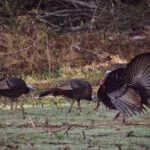
Be sure to shoot at 3D deer targets to develop your ability to aim when no clear aiming point is visible.
Shooting only at 3-Ds, your groups can be loose, but all of your arrows can still be in the vitals. We don’t want that. We want to shoot five arrows and be able to pull them all with one had. To do that, you’ll need to work bull’s-eye targets into your practice sessions. On the flip side, though, don’t shoot bull’s-eyes exclusively. If you do that, you might find it difficult to aim at a 3-D deer – or a live deer – where there is no clear aiming point. Practicing with 3-D targets will help you develop the ability to aim at nothing and put your arrow where you want it. You’ve probably heard people say that when you aim at a deer, you should pick a tuft of hair or a shadow or something else that’s visible in the deer’s vital area to focus on as your aiming point. That’s true, but hunt long enough and you will encounter times when nothing stands out as an aiming point. When the light if poor, which it often is in the woods at prime time, a deer’s body can look flat and even. Nothing will jump out at you, saying, “Aim here.” You have to pick your spot in the vitals and put an arrow into it.
ACCURATE GEAR
Sights and stabilizers can dramatically affect accuracy. When it comes to accuracy and bow sights, it’s all about perspective. The farther away from your eye your sight pin sits, the more precise you can be with your aiming. What happens as your sight pin moves away from your eye is it appears to get smaller and smaller. So think about the difference between covering the bull’s-eye with your pin, versus having the ability to place your pin in different spots within the bull’s-eye.
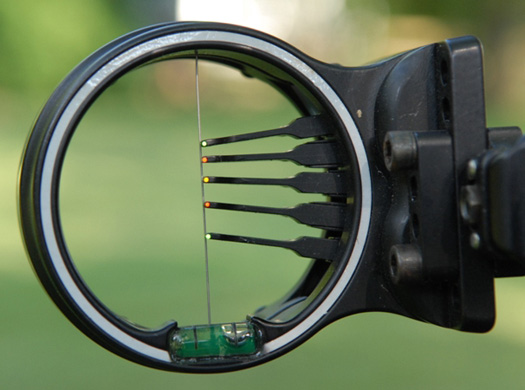
This sight has .019 sight pins. The smaller pins will allow for more precise aiming.
Precision aiming leads to precision shooting. You can get that sight pin farther from your eye by choosing a sight that has a longer bar than the one you’re using now. You can also shrink your sight pin by actually choosing a smaller sight pin. If you have a pin that’s .039 inches, try one that’s .029 or .019. It might not seem like that will make much of a difference, but once you look at a smaller pin through your peep sight, you’ll be surprised at how much more of the target you can see.
Try a longer stabilizer and see if it doesn’t help tighten your groups.
The name “stabilizer” tells you exactly what this accessory is supposed to do. It adds weight to the bottom of the bow, so it stays vertical when you’re shooting, and it’s supposed to help you in the fight against torque. Well, the best stabilizer is a long one with the bulk of the weight at the end away from the riser. Bowhunters don’t want to get too crazy with the weight and length of their stabilizers. We might have to carry our bows for hours while in the field to hunt. Try a 12-incher with 6-10 ounces of weight at the very end, and see if your groups start to shrink. Improving accuracy should be the goal of every bowhunter. Try these five tips and see if you don’t start filling more tags.