LAST UPDATED: May 1st, 2015
Is it fair to say trail cameras have changed the way we hunt? I think so. They allow us to take an up-close look at the lives of the whitetails we hunt 24 hours a day, seven days a week. Twenty years ago, we found preferred travel corridors and feeding and bedding areas on the lands we hunted by “in-person” observation. That was an imperfect system, to say the least. It was quite common to always be one step behind the bucks we were chasing. And, as we now know through trail-camera monitoring, there probably were giant bucks out there that we never even knew existed. If we didn’t see those deer with our own eyes on our scouting missions, they weren’t out there, as far as we were concerned. And if we didn’t know they were there, we couldn’t develop an attack plan to get within bow range.

Trail cameras allow bowhunters to scout 24hrs a day, 7 days a week. Without a doubt, the knowledge gained is priceless.
Those days are gone, thankfully. With trail cameras, we can keep close track of the deer we’re hunting. We know what bucks are in the herd. We know when and where they feed. And we can figure out how they get to and from those places – all through the use of trail cameras. Sounds easy doesn’t it? Well, it’s not quite that simple. Spend a few seasons playing with these cameras, and you’ll discover a variety of pitfalls. Short battery life, motion sensors that activate the camera beyond the range of a flash or infrared, improper camera positioning, thieves – the list can go on and on. But, these are just the tip of the iceberg.
If you are new to the trail camera game, or you have a few seasons under your belt, the following tips and tactics can help you get what you want out of your trail cameras this season and for many to come.
SPENDING CASH
There’s no question cost is a major factor in deciding which camera to choose, if it’s not the No. 1 factor. You should also consider one other thing about a trail camera’s cost….be prepared to lose your investment the instant you walk away from it. Thieves and vandals are determined to take it, and although there are ways to help secure your cameras, if someone wants to steal or destroy them bad enough, they’ll find a way to do so when you’re not around.
Take for example my close friend who received a mid-priced camera last Christmas from his girlfriend. He put it in the privately owned woods 400 yards behind his house on Christmas day. When he went back to check the card at 10 a.m. Dec. 26, the camera was gone! Theft and vandalism are unfortunate, but they’re reality. Do you feel comfortable losing $600? Or is $100 your ceiling? Only you can decide.
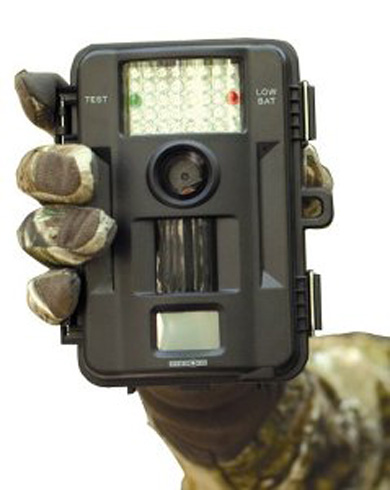
Today’s trail cameras come with a host of features. Decide which ones are right for you before spending the money for those you don’t really need or want.
Generally – as the saying goes – you get what you pay for when it comes to trail cameras. Cheap cameras usually are just that. Cheap. They often have less expensive components and usually have fewer functions than the higher-end models. But that doesn’t mean they won’t work for you. The trick is to figure out what you want from your cameras and then decide which ones you can afford. If all you want are daytime photos from a camera pointed at a mineral lick, just about any camera on the market is going to do the job. Things get pricey when you want a camera to shoot high-definition video, or you want infrared, night imaging with no visible light to attract potential thieves. The more advanced the camera, the more you can expect to pay.
LIGHTING
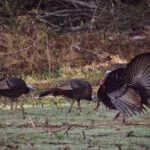
One of the first features most hunters weigh when choosing a trail camera is the type of “lighting” that is used for nighttime shots. And let’s be realistic. If you’re putting out a trail camera, you want it to take nighttime photos. That’s often when you get the best pictures of the biggest bucks.
Cameras that employ a flash take good, color photos. But they also tell thieves and vandals exactly where your cameras are. And some hunters believe the flash spooks deer – especially mature deer. You’ll find an equal number of hunters on both sides of that fence.

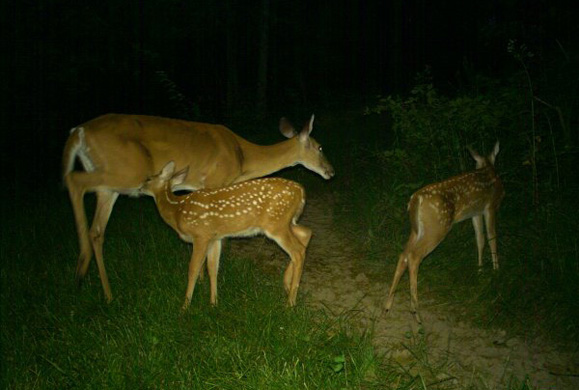
The above images are from cameras with night-time “flash” and infrared capabilities.
Cameras that employ infrared technology capture nighttime images with no color (gray scale) but technically black and white. Some emit a red light that is visible to humans, but supposedly not to deer. There are some newer models that emit no light whatsoever. These are the stealthiest of all the trail cameras. Also, daytime photos aren’t really an issue. Most infrareds and flash cameras will take full-color daytime photos.
IMAGE RESOLUTION
The size of the photo files a camera captures is one factor that dictates its price. Typically, the higher the resolution is…..the higher the price. A camera’s resolution is declared in megapixels.
So, what makes an 8 megapixel photo better than a 4 megapixel? It’s easier to see fine detail in the higher resolution photo. Also, you can enlarge a photo with higher megapixels in order to do things like inspect a buck’s antlers closely, or identify a somewhat obscured object that’s in the photo’s background. Comparatively, the lower resolution image will get blurry the more you enlarge it.
Just for a point of reference, most point-and-shoot digital cameras sold today at your local big-box stores are 10 megapixels or more. For viewing photos on a computer screen, image resolution is less important than if you plan to make prints. You can blow up a 2 megapixel photo fairly big on your computer and still see fine detail.
IMAGE STORAGE
Most cameras today accept SD cards, or similar, removable memory devices, for storing photos and video clips. Some also have internal memory, but the memory cards are the simplest way to go. You can pull one card to check your photos, replace it with another and let the camera keep on running.
If you have a camera capable of shooting video clips and you set it to record those, rather than photos, understand you will need a card with a ton of memory space. Videos gobble up memory much faster than photos. Video buffs should opt for the largest memory card the camera will accept, which might be 32 gigabytes (GB).
Those of you interested in photos don’t need that much memory. Go for a 4 or 8 GB card. They’re not terribly expensive, and they’ll allow your camera to capture thousands of images before the card is full. You’ll be surprised how many photos a camera can capture in a week’s time, especially if it’s posted in an area frequented by raccoons and birds. I once left a camera out for two days, during which time it took over 700 photos of a flock of crows that decided to frolic in the area.
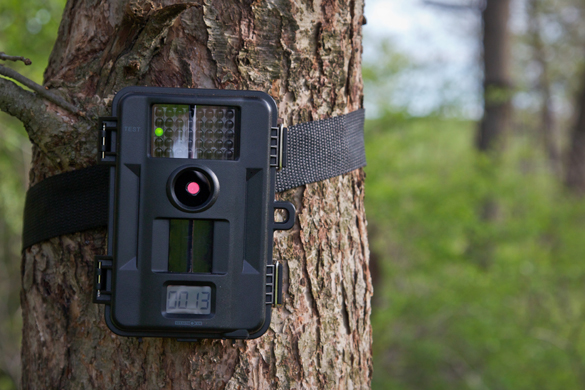
The trend today is for smaller cameras that provide bigger features. Don’t let the minature status of some cameras lead you to believe that they are lacking in certain areas of performance.
Several companies offer hand-held card readers so you can view your photos in the field. This will appeal to those of you who want instant gratification. Otherwise, you can take your camera cards home and view the photos on your computer, or take them to one of those self-serve instant photo machines – most of which accept all kinds of memory cards.
POWER
There are cameras on the market today that run on everything from simple AA batteries to solar power. I’ve even seen some that can be hooked to car batteries. Obviously, those that use regular batteries are the easiest to work with.
There was a time when most cameras operated on D-cell batteries, and there are some on the market that still do. Those cameras tend to be pretty big. The new trend is to have smaller cameras that are less visible to would-be thieves and to woodland critters alike. Those cameras generally are powered by 12 AA batteries.
Manufacturers will make all sorts of claims about how long a camera can run on a fresh set of batteries. Count on those claims being a bit overstated. And when the mercury drops, so too will the life of your batteries. The colder it is, the shorter your batteries will last.
TRIGGER SPEED
The faster your camera detects motion and then snaps a photo, or starts a video clip, the more activity you will capture. If you get a lot of photos of deer butts, that’s usually an indication the trigger speed is slow enough that the deer was able to step most of the way out of the camera’s frame after tripping the motion sensor before the photo snapped.
Less expensive cameras tend to have the slower trigger speeds. And a slow trigger speed doesn’t have to be a deal breaker. You just have to know the camera’s limitations, and account for them through proper camera placement.
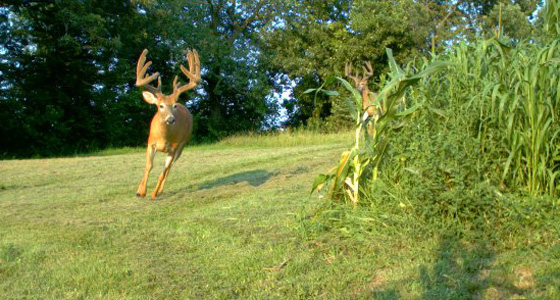
Positioning the camera so deer approach it keeps you from getting photos of partial deer. Also, notice the buck to the right that might have been missed if the camera were positioned differently.
PLACEMENT
Whenever possible, I like to position my cameras facing the direction from which I expect deer to approach. This gives me the best chance of getting the whole deer in the frame. If you put your camera so that most deer walk past it from left to right or vice versa, you are going to miss shots. Let’s say a doe leads a 160-class buck down the trail and the doe trips the camera. Depending on how fast you have your camera set to take successive photos, the buck could be through the camera’s target area before it re-arms itself. If the camera were facing down the trail the deer were on, there’s no way one could get through without the camera capturing a photo of the other.
When shooting into fields, positioning a camera to catch approaching deer can be tough, since the camera most likely will have to be placed on the edge pointing out. You can angle those cameras, however, so they’re not just shooting perpendicular to the field. For example, put two cameras side by side, shooting at opposing angles out into a field, and you can cover a lot of country. You’ll need a deer to venture close enough to trip the camera to take a photo, but that photo will capture every deer within the camera’s view.
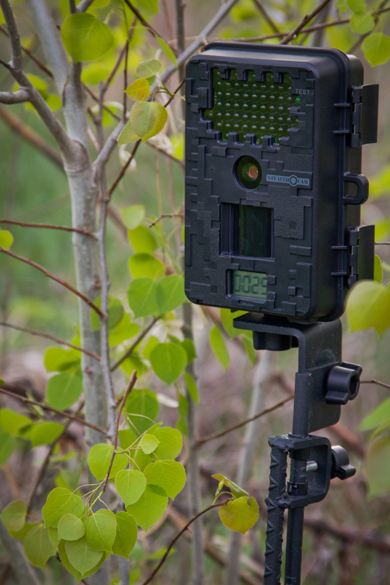
When a siutable tree cannot be found to mound your camera, alternatives do exist in order to place your unit in just the right spot.
Trees and fenceposts are the most obvious places to attach your cameras. But if you need to, you can plant your own post to hang a camera wherever you want. Just don’t put that post in the farmer’s way. I can tell you from experience, he might not bother getting off the tractor to move it.
Be sure there are no flexible branches or tall grass within your camera’s trigger range, or, on windy days, you’ll end up with a lot of photos of nothing when that vegetation trips your camera over and over. Some cameras have sensitivity adjustments that allow you to account for such situations, but I’d rather clear the camera’s trigger range than make the trigger less sensitive to motion.
SECURITY
It’s nearly impossible to totally protect a trail camera against theft and/or vandalism. There are lock boxes and cables you can employ to make it tougher for someone to harm or steal your camera, but, in the end, where there’s a will, there’s a way. Without a doubt, it’s a good idea to spend as much cash and effort as you can afford to secure your cameras and protect your investment.

Ultimately, scouting cameras help you fill more tags!
Conclusion
The best way to learn how to use trail cameras, or decide which one is best for you, is to buy a couple and experiment with them. Through trial and error, you’ll figure out how to get the performance you want, so you can get the drop on that elusive buck this fall. Good luck!