LAST UPDATED: May 8th, 2015
Okay, now that we have addressed the importance of setting attainable goals for your hunting property, let’s move forward with the next two steps in the food plot process. First we will discuss property layout. This will help the hunter/ land manager determine the best areas to start looking for a plot location. Then, we will delve into ways to pinpoint the exact location of the plot.
To get a better understanding of where to begin planting a food plot, the best place to start is an aerial photograph. Using aerial imagery and topo maps, decide which areas of your property will be a sanctuary and which areas will be used for hunting. Sanctuaries are very important to establishing a high quality hunting property. This is true of even small pieces of land; in fact, I would say it is MORE important than on large farms.
Like most hunters, I do not own thousands of acres of hunting property. Most of the farms I have access to are less than 300 acres. One of my best farms is only 68 acres. I learned a long time ago that if I could provide deer a great, unpressured bedding area, with food close by, I would in return have a deer population I could hunt. More than half of the acreage on our farms is designated sanctuary, with food plots surrounding a good number of them. The only time we set foot in a sanctuary is to track a wounded deer and shed hunting in the spring. I highly recommend taking a marker and outlining the different features of your property. It is surprising how “connecting the dots” can provide information you may have never noticed. When doing so, be sure to outline different terrain or cover and label things such as pines, hardwoods, CRP, etc. Once you have sufficiently marked up an aerial photograph, start looking for where your lines overlap.
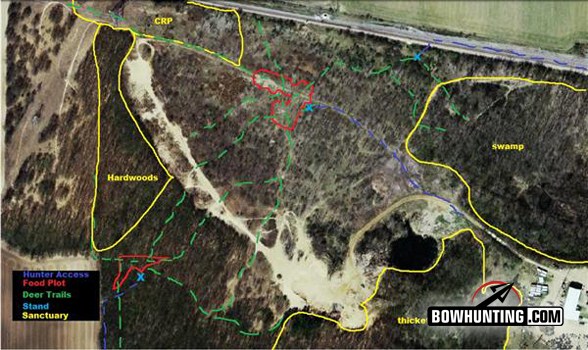
Aerial photos are invaluable to hunters who want to manage their land
The places where different types of topography come together make great natural funnels. Look closely at these because they may reveal some new potential stand sites. Small openings or flat spots near such areas may also be good food plot locations. Once you have located a few potential areas it’s time to put some boot tracks on the ground. Walk each area in order to decide which will best suit your goals. To determine this, consider the following: First and foremost, you must be able to access the spot without alerting the deer you are hunting. This may mean deciding you can only hunt this location on a certain wind. The entrance and exit from the area must be bulletproof. If you can’t get into the area without spooking any deer (even in the dark) it is not worth investing time into it; move on to another spot.
Small irregular food plots near a sanctuary will make bucks more likely to use them during daylight.
I strategically place hunting and feeding food plots near the sanctuary in such a way that any non-QDM neighbors and road hunters cannot benefit from what I’m attempting to do. In other words, I try to keep the deer on the interior of the property rather than the edges. In addition, if a particular food plot is earmarked as a hunting food plot, I go out of my way to make sure that the wind and sunlight direction will be in the hunter’s favor. After selecting an area with a foolproof entrance and exit strategy, begin searching for the best tree to hang a stand in. Many hunters lay out the food plot first and then try to find a tree they can adequately hunt from. I think this is a backwards process. If you are going to be putting the effort in to clearing out an area to be a food plot, you can put it pretty much anywhere you want, so why not build the plot around the perfect tree? After locating the tree, (ideally the one with the best cover to shooting lanes ratio) lay out the plot. My hunting food plots have an irregular shape and are less than a half-acre in size.
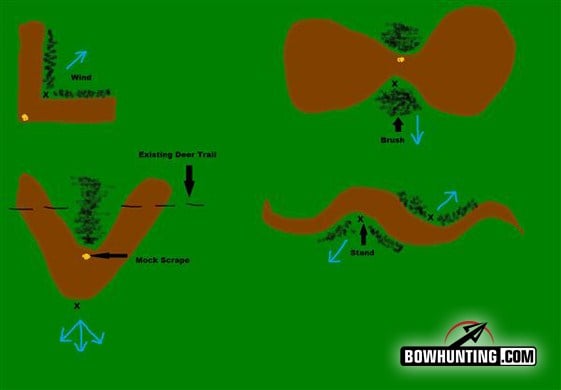
If you are creating the area for the plot from scratch, you have the ability to use the design of the plot to bring deer past your stand. My top four favorite kill plot shapes are: The L, Hourglass, V (or boomerang), and S. All create funnels that will bring deer past the hunter’s tree stand. The L plot works well when placed on an inside or outside corner between a large agricultural field and the woods. When I plant these I like to leave a buffer strip of 6-8 rows of corn or Egyptian Wheat on the field side of the plot. This helps the deer feel more at ease and they will stage in the plot during daylight before going to the large destination field. Another thing I like to do is plant each “leg” of the L in a different forage….encouraging deer to walk from one side to the other (and past my stand).
The hourglass is a great plot for thicker areas in the woods. I clear two circles about 30 yards in diameter, and make a single path about 15 yards wide connecting the two. I use all the brush and debris from clearing the area to block off everything but the pinch point of the hourglass; thus, forcing the deer to use it instead of walking through the woods. Once again I like to plant the two halves with different forages, encouraging more traffic through the pinch point.
My favorite small plot is the “V” or boomerang plot. This one plays on a deer’s natural curiosity and wariness. To make the “V” plot, I cut two 15 x 35 yard long paths away from the stand at 45 degree angles. I like to place this one over an existing deer trail and then blocking off the part between the two legs with brush. This way any deer walking the trail will enter the plot and take the route of least resistance; around the brush and through the plot. Also, if a deer enters the plot on one end, the brush blocks its view of the other side. Deer do not like not being able to see everything in their surroundings. This will also make the deer congregate towards the apex of the plot. They will most often begin feeding facing away from the hunter’s stand so they can watch both legs of the plot, giving bowhunters great shot opportunities. A mock scrape placed at the apex gives it a final touch.
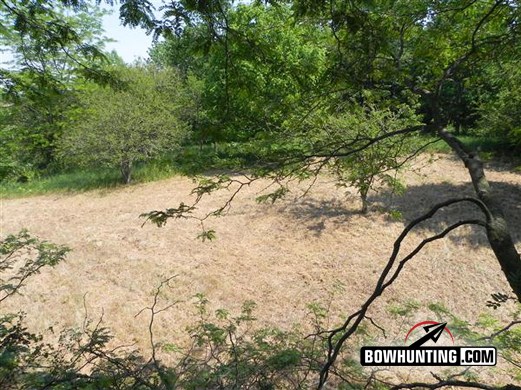
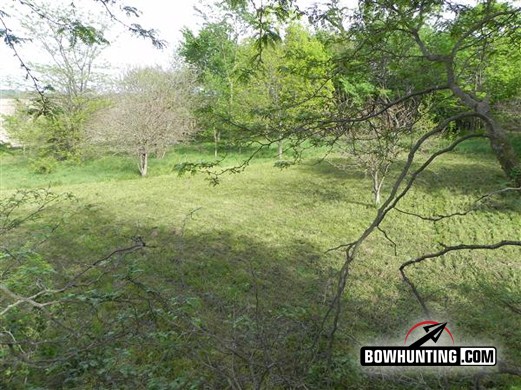
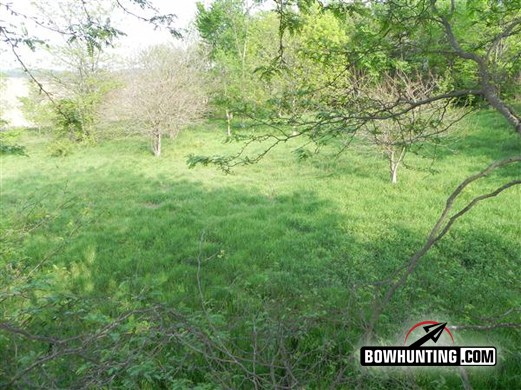
The author’s new plot, designed around the perfect tree, before work started, after mowing, and after spraying.
I also use the Lazy S plot. This one meanders back and forth. There are two situations when I like to use this type of plot shape. One is at the bottom of a valley between two ridges. The other is next to the bank of a creek or river. This particular plot design also allows for multiple stand locations, allowing the hunter to hunt the plot on several different wind directions. I love long skinny plots as opposed to round or square ones because any deer that enters a long narrow plot (especially bucks) will almost always walk the entire length of it. If you have a stand somewhere along the edge, chances are he will walk by it. Big round or square plots don’t always guarantee that.
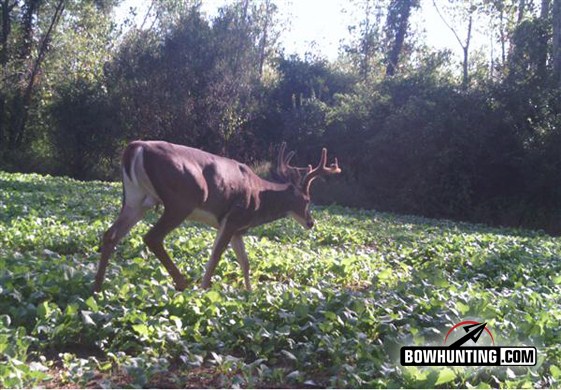
Food plots can not only attract deer, but funnel them past your stand for a shot.
That isn’t to say that all food plots have to have a particular shape. Many of my own plots have no specific shape; I’ve just adapted the plot to the contours of the land the best I could. There is no “set in stone” design for a plot. Each one is different. Just be smart and creative and the results will be well worth the effort.
After constructing the area for the plot, it’s time to test the soil. Keep in mind that there is a right and wrong way to do a soil test. To begin with, take a bucket and a shovel and go out into the plot. Dig down about 4-6 inches and put the soil in the bucket. Don’t just rely on one sample though. Take 5-6 samples from all over the plot, as PH and nutrient levels can vary across the plot. Mix all the samples together thoroughly, and then lay the dirt out on some newspaper for a couple days to let the moisture dry out of it. After it is dry, fill a soil test bag and send it to a testing facility. There are many Labs around the country that provide soil testing services. Several food plot seed companies also offer soil testing.
While you wait for the soil test results, you can begin to mow or spray the new plot to kill any existing vegetation. Don’t skimp on the weed killer. I buy store brand 41% Glyphosate (Roundup) concentrate for about $20 a gallon at farm supply stores. I mix it heavy, REALLY heavy. We are trying to kill stuff here, and the weeds in your food plot area are most likely more resilient than dandelions in the yard. Larry Weishun once told me “I don’t believe in overkill. There is no way to kill anything any deader than dead!” (He was talking about deer but I’m applying the principle here). I mix my weed killer at about 3 to 4 times the rate on the bottle. Big fancy sprayers aren’t necessary either. I use a 4 gallon backpack sprayer, which is usually enough to spray anything ½ acre or smaller. I paid about $65 for mine. If grass is present, I mow it first, and then wait about a week for new growth to start coming back before spraying.
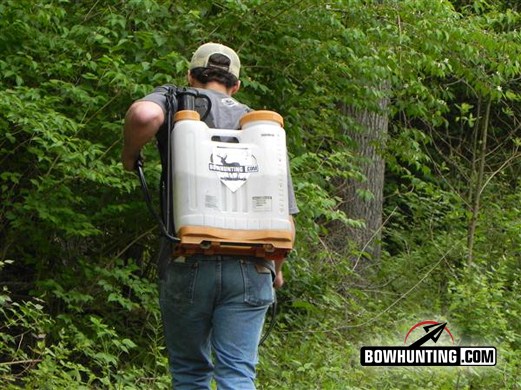
A good heavy dose of round up will take care of any weeds present before planting.
A properly designed food plot can often mean the difference between success and failure. Simply throwing some seed down in the woods does not make it a great food plot. Only careful planning and proper execution will give you the results you want. This will prepare you for the next step, “Forage Selection”, which we will delve into more, along with examining our soil test results, in the next article.